Apparently I was not the only one revved up over Renee Moilanen's recent article: Parents should relax a bit about kids' food allergies. My open letter to the writer saw lots of action yesterday! Thank you for all the love.
For the record, I received a personal response from Renee Moilanen via email. She has also issued a public apology you can read here. In my opinion the apology falls a little short. It's more of an "I'm sorry BUT" rather than a simple "I'm sorry."
In any event, Moilanen is a mom too who I believe genuinely does not wish ill will on any child. And you have to admit, she got us talking.

Tuesday, April 30, 2013
Monday, April 29, 2013
Open Letter to Renee Moilanen who believes parents should relax a bit about kids' food allergies
If you were on Facebook or Twitter or online at all last week you no doubt had the pleasure of reading the mean girls style sorority rant that was making the rounds. What you might have missed, however, was the food allergy-fueled mommy version.
 A few days ago freelance writer and mother, Renee Moilanen published a piece on DailyBreeze.com entitled: Parents Should Relax a Bit About Kids' Food Allergies.
I'll let you take a moment to peruse the article but if you'd rather spare yourself, here's the gist. Ms. Moilanen is dismayed that her non-allergic son had to celebrate his 3rd birthday (in the preschool classroom) with soy ice cream bars due to the allergies of his fellow students. Despite her heroic attempt to bring in a safe treat, one child still ate graham crackers rather than soy ice cream bars, causing her, that is, Moilanen, not the child, immense irritation. Moilanen's personal experience being that she "chose" not to accept her own son's food allergy (he got a rash around his mouth after eating eggs as a baby and now it turns out he can eat them) she feels certain that the vast majority of parents of food allergic children are exaggerating or flat out making up their kids' allergies.
OK. Got that? Good.
Understandably Ms. Moilanen is catching a lot of flack in the comments section of her article and elsewhere around the web. I can't say I disagree with much of the commentary but this woman is, after all, a mother, and I can only assume that the best interest of her child is at the heart of the rhetoric. I've always taken a middle of the road stance when it comes to trying to manage food allergies in schools, but this really got to me. In hopes that it is ignorance rather than malice behind the piece, my open letter to Renee Moilanen follows.
 Dear Ms. Moilanen,
Let me begin with an apology. I am sorry that you find food allergies to be inconvenient. Believe me, I can relate. Allergies are no fun.
As a room parent responsible for organizing parties and social events for multiple allergy-infested preschool and elementary classrooms, I understand what an inconvenience food allergies can be. As the mother of children both with and without food allergies and as a compassionate human being, I found your recent piece to be poorly researched, mean-spirited and dangerous.
You wonder, could 20 percent of the children in your son's preschool classroom possibly have true food allergies? My apologies again, but yes, most definitely. Based on your figures 1-2 percent of children have true food allergies (though other studies put the number closer to 8%). I can't help but wonder, are there a lot of white kids in his class? Do you live in an affluent neighborhood? Race and income have both been shown to impact the prevalence of food allergies. Are the preschoolers in his class generally preschool-aged? Yeah, well, that ups the ante too. With a sample size of 15 students, I fear your trusty percentages are going to be hard to enforce.
Caucasians have more allergies than any other race. Of course, my son is half Indian (perhaps you'll hold that against him too, but again, it is yet another physical characteristic over which he has no control) and he still ended up with multiple food allergies despite Asians having the lowest incidence of allergies overall. Maybe this allergy thing doesn't always play by the rules.
Your assertion that parents somehow overreact or worry their children into an allergic state is misinformed and insulting. I will cede the point that death by food allergy is, thankfully, rare. I cannot agree though, that a few days of crippling stomach cramps, bloody stools, skin welts and vomiting are inconsequential medical events to those involved.
Just imagine dropping your child off each and every day for a mandatory play date (aka school) in a building where you knew there was an unsecured loaded gun hidden away on a high closet shelf. What are the chances that your kid is going to stumble upon the gun? Not great. Even if he does find the gun, what are the chances he'll shoot himself with it? Pretty low, I'd say. How about one of his play date buddies? Again, the chances are probably not all that high. Maybe you'll get lucky and he'll just shoot himself in the foot. In a few days he'll be out of the hospital ready for his next play date, right? Wait...not right?
So, would you go so far as to ask the teacher or other parents to secure the weapon even if all the other kiddos liked guns and had undergone appropriate weapons training? Would you skip the play date all together? Or maybe you'd just send your kid in anyway so as not to cause a scene or inconvenience anyone? You tell me because that's the choice I and thousands of other parents make every day when it comes to food allergies, school, and our kids.
Yes, the gun analogy is cliched and extreme but so are many food allergies. Severe does not need to be synonymous with death. The unfortunate truth is that food allergies are unpredictable. Will my child die if he eats an egg-laced cookie? Nope, probably not. But then again, you never know. Every allergic reaction is an individual event. The best predictor is a previous reaction, but again, there are no guarantees.
I guess what I'm asking for here is a little compassion or at least open-mindedness when it comes to allergies, because it is hard. It is so gut-wrenchingly hard to give a quick kiss and walk away from your child not knowing if today is the day the dreaded phone call is going to come. In my experience, kids are inherently understanding and supportive when it comes to allergies in the classroom. It's only when the parents get involved that things start to get ugly. Knowing that other parents are not only unsympathetic but actively annoyed that my son might bring along his own safe snack is especially excruciating. Talk about setting the scene for bullying.
I don't have all the answers regarding the handling of food allergies in schools, but neither do you.
Once you've attended the allergy appointments, held a squirming toddler for countless prick tests and patch tests, and cleared your schedule for day-long administration of flu shots, once you have refilled dozens of prescriptions for epi-pens and spent weekends huddled around the toilet rubbing your son's back as he shivers and retches in pain caused by a piece of "egg-free" cornbread that turned out not to be, then I'll be ready to listen to your advice on handling my kid's allergies.
Until then, there is absolutely no good that can come from judging the parenting strategies of allergic families any more than can come from my judgement that you're raising your son in an uncompassionate junk food-riddled environment. How about I allow that you're competent enough to feed your child and you admit that you might not know everything there is to know about feeding mine.
After all, we're the parents.
Sincerely,
Amy Moriarta

I'll let you take a moment to peruse the article but if you'd rather spare yourself, here's the gist. Ms. Moilanen is dismayed that her non-allergic son had to celebrate his 3rd birthday (in the preschool classroom) with soy ice cream bars due to the allergies of his fellow students. Despite her heroic attempt to bring in a safe treat, one child still ate graham crackers rather than soy ice cream bars, causing her, that is, Moilanen, not the child, immense irritation. Moilanen's personal experience being that she "chose" not to accept her own son's food allergy (he got a rash around his mouth after eating eggs as a baby and now it turns out he can eat them) she feels certain that the vast majority of parents of food allergic children are exaggerating or flat out making up their kids' allergies.
OK. Got that? Good.
Understandably Ms. Moilanen is catching a lot of flack in the comments section of her article and elsewhere around the web. I can't say I disagree with much of the commentary but this woman is, after all, a mother, and I can only assume that the best interest of her child is at the heart of the rhetoric. I've always taken a middle of the road stance when it comes to trying to manage food allergies in schools, but this really got to me. In hopes that it is ignorance rather than malice behind the piece, my open letter to Renee Moilanen follows.

Let me begin with an apology. I am sorry that you find food allergies to be inconvenient. Believe me, I can relate. Allergies are no fun.
As a room parent responsible for organizing parties and social events for multiple allergy-infested preschool and elementary classrooms, I understand what an inconvenience food allergies can be. As the mother of children both with and without food allergies and as a compassionate human being, I found your recent piece to be poorly researched, mean-spirited and dangerous.
You wonder, could 20 percent of the children in your son's preschool classroom possibly have true food allergies? My apologies again, but yes, most definitely. Based on your figures 1-2 percent of children have true food allergies (though other studies put the number closer to 8%). I can't help but wonder, are there a lot of white kids in his class? Do you live in an affluent neighborhood? Race and income have both been shown to impact the prevalence of food allergies. Are the preschoolers in his class generally preschool-aged? Yeah, well, that ups the ante too. With a sample size of 15 students, I fear your trusty percentages are going to be hard to enforce.
Caucasians have more allergies than any other race. Of course, my son is half Indian (perhaps you'll hold that against him too, but again, it is yet another physical characteristic over which he has no control) and he still ended up with multiple food allergies despite Asians having the lowest incidence of allergies overall. Maybe this allergy thing doesn't always play by the rules.
Your assertion that parents somehow overreact or worry their children into an allergic state is misinformed and insulting. I will cede the point that death by food allergy is, thankfully, rare. I cannot agree though, that a few days of crippling stomach cramps, bloody stools, skin welts and vomiting are inconsequential medical events to those involved.
Just imagine dropping your child off each and every day for a mandatory play date (aka school) in a building where you knew there was an unsecured loaded gun hidden away on a high closet shelf. What are the chances that your kid is going to stumble upon the gun? Not great. Even if he does find the gun, what are the chances he'll shoot himself with it? Pretty low, I'd say. How about one of his play date buddies? Again, the chances are probably not all that high. Maybe you'll get lucky and he'll just shoot himself in the foot. In a few days he'll be out of the hospital ready for his next play date, right? Wait...not right?
So, would you go so far as to ask the teacher or other parents to secure the weapon even if all the other kiddos liked guns and had undergone appropriate weapons training? Would you skip the play date all together? Or maybe you'd just send your kid in anyway so as not to cause a scene or inconvenience anyone? You tell me because that's the choice I and thousands of other parents make every day when it comes to food allergies, school, and our kids.
Yes, the gun analogy is cliched and extreme but so are many food allergies. Severe does not need to be synonymous with death. The unfortunate truth is that food allergies are unpredictable. Will my child die if he eats an egg-laced cookie? Nope, probably not. But then again, you never know. Every allergic reaction is an individual event. The best predictor is a previous reaction, but again, there are no guarantees.
I guess what I'm asking for here is a little compassion or at least open-mindedness when it comes to allergies, because it is hard. It is so gut-wrenchingly hard to give a quick kiss and walk away from your child not knowing if today is the day the dreaded phone call is going to come. In my experience, kids are inherently understanding and supportive when it comes to allergies in the classroom. It's only when the parents get involved that things start to get ugly. Knowing that other parents are not only unsympathetic but actively annoyed that my son might bring along his own safe snack is especially excruciating. Talk about setting the scene for bullying.
I don't have all the answers regarding the handling of food allergies in schools, but neither do you.
Once you've attended the allergy appointments, held a squirming toddler for countless prick tests and patch tests, and cleared your schedule for day-long administration of flu shots, once you have refilled dozens of prescriptions for epi-pens and spent weekends huddled around the toilet rubbing your son's back as he shivers and retches in pain caused by a piece of "egg-free" cornbread that turned out not to be, then I'll be ready to listen to your advice on handling my kid's allergies.
Until then, there is absolutely no good that can come from judging the parenting strategies of allergic families any more than can come from my judgement that you're raising your son in an uncompassionate junk food-riddled environment. How about I allow that you're competent enough to feed your child and you admit that you might not know everything there is to know about feeding mine.
After all, we're the parents.
Sincerely,
Amy Moriarta
Saturday, April 27, 2013
Sesame Sweet Potato Miso Dip
I owe many a luxurious and enlightening Sunday afternoon to one fine group of ladies. How else would I justify needing to spend a cozy hour curled up in an armchair furiously finishing a novel? And more importantly, when would I get to chomp pecan cookies, start drinking at one in the afternoon or have the excuse to make egg-filled cakes and other contraband delights? Give it up for book club.
Sure, sometimes we overdo it on the wine, but typically not until after we discuss the book. Briefly.
 Not only do my book club ladies read, they cook. And they eat (with enthusiasm I might add) all the stuff I don't normally get to make at home. And I love them all the more for it.
Every time book club rolls around I'm faced with the impossible decision: sweet or savory? Clearly the answer is both. This time around blueberry-lemon yogurt cake with lemon cream was an easy sell and will be coming in a later post. I have promised Roo an egg-free version. Wish me luck.
The real dark horse though, is this crazy good sweet, silky, salty dip.
 Sesame is such a rock star - all that toasty deep earthy flavor of nuts,
without the nuts. Add the creamy sweetness of the
potatoes, salty bite of miso and my friends, you have one heck of
a dip on your hands.
Sesame is such a rock star - all that toasty deep earthy flavor of nuts,
without the nuts. Add the creamy sweetness of the
potatoes, salty bite of miso and my friends, you have one heck of
a dip on your hands.
I actually had no intention of sharing with the kids but when Bean came by asking what that yummy smell was (toasting sesame seeds) I couldn't pass up the opportunity. The kiddos dipped snap peas and carrots and somewhat shockingly, no one snorted, choked, or exhibited odd facial contortions. A couple of kids even came back for a second round. That's a winner in my book.
Sesame Sweet Potato Miso Dip
adapted from Sunset Magazine December 2010
1 pound sweet potatoes
1 tbsp minced fresh ginger
2 tbsp white miso
2 tbsp tahini
2 tsp soy sauce
1 scallion, thinly sliced
toasted sesame seeds for garnish
Peel the sweet potatoes and cut into large chunks. Place the potatoes in a large pot and cover with water. Bring to a simmer over medium heat and cook until soft but not falling apart, about 15-20 minutes. Remove the sweet potatoes from the water and allow to cool slightly. Reserve the cooking liquid.
Combine the cooked potatoes, ginger, miso, tahini, and soy sauce in a food processor or powerful blender. Puree the mixture, adding cooking liquid from the potatoes as needed until the mixture is smooth and silky. Transfer the dip to a serving bowl. Sprinkle with scallions and toasted sesame seeds. Serve with fresh vegetables for dipping.

Sure, sometimes we overdo it on the wine, but typically not until after we discuss the book. Briefly.

Every time book club rolls around I'm faced with the impossible decision: sweet or savory? Clearly the answer is both. This time around blueberry-lemon yogurt cake with lemon cream was an easy sell and will be coming in a later post. I have promised Roo an egg-free version. Wish me luck.
The real dark horse though, is this crazy good sweet, silky, salty dip.

I actually had no intention of sharing with the kids but when Bean came by asking what that yummy smell was (toasting sesame seeds) I couldn't pass up the opportunity. The kiddos dipped snap peas and carrots and somewhat shockingly, no one snorted, choked, or exhibited odd facial contortions. A couple of kids even came back for a second round. That's a winner in my book.
Sesame Sweet Potato Miso Dip
adapted from Sunset Magazine December 2010
1 pound sweet potatoes
1 tbsp minced fresh ginger
2 tbsp white miso
2 tbsp tahini
2 tsp soy sauce
1 scallion, thinly sliced
toasted sesame seeds for garnish
Peel the sweet potatoes and cut into large chunks. Place the potatoes in a large pot and cover with water. Bring to a simmer over medium heat and cook until soft but not falling apart, about 15-20 minutes. Remove the sweet potatoes from the water and allow to cool slightly. Reserve the cooking liquid.
Combine the cooked potatoes, ginger, miso, tahini, and soy sauce in a food processor or powerful blender. Puree the mixture, adding cooking liquid from the potatoes as needed until the mixture is smooth and silky. Transfer the dip to a serving bowl. Sprinkle with scallions and toasted sesame seeds. Serve with fresh vegetables for dipping.

Wednesday, April 24, 2013
Crispy Iberian Pork Bites
When all else fails, serve dinner on colorful toothpicks.
 So easy, very little hands on time, relatively neat to eat one-handed while doing homework, and totally customizable with whatever you happen to have on hand in the spice cabinet, meet your new best friend on a busy school night.
 No lemons? Use limes. Not feeling the cumin and paprika? How about lime juice, soy sauce, freshly grated ginger, and a splash of fish sauce for an Asian vibe instead? Use the Spanish-style version below as a jumping off point but then feel free to play around. The flavor profile possibilities are limitless. Try lime, chili powder, cumin, and fresh cilantro for a taco-like feel. Or how about lemon juice, red wine vinegar, thyme, and oregano for a Greek take? Ooh, serve those with some sliced tomatoes and cubes of good Feta cheese. Whatever you do, don't forget the cute toothpicks.
Crispy Iberian Pork Bites
adapted from How to Cook Everything by Mark Bittman
2 pounds pork shoulder, trimmed of some, but not all fat
1 tbsp minced garlic
1 tbsp ground cumin
2 tsp paprika
1 tbsp lemon zest
1 tbsp kosher salt
1/4 cup fresh squeezed lemon juice
1/2 cup minced onion
1 tbsp olive or canola oil
Cut the meat into 1x1-inch cubes. Put the meat in a large, nonreactive bowl and toss with all of the remaining ingredients. Cover and refrigerate for at least an hour and up to 2 days.
 Preheat the oven to 375 degrees. Scatter the meat on a rimmed roasting pan in a single layer. Roast for about an hour, stopping to stir the meat occasionally. You want it crisp and brown on all sides, but not burned. Remove the meat from the pan with a slotted spoon. Serve on toothpicks with lemon wedges and/or Cumin Yogurt Dip.


Crispy Iberian Pork Bites
adapted from How to Cook Everything by Mark Bittman
2 pounds pork shoulder, trimmed of some, but not all fat
1 tbsp minced garlic
1 tbsp ground cumin
2 tsp paprika
1 tbsp lemon zest
1 tbsp kosher salt
1/4 cup fresh squeezed lemon juice
1/2 cup minced onion
1 tbsp olive or canola oil
Cut the meat into 1x1-inch cubes. Put the meat in a large, nonreactive bowl and toss with all of the remaining ingredients. Cover and refrigerate for at least an hour and up to 2 days.


Sunday, April 21, 2013
Churros with Chocolate Sauce
Somebody start building the ark.
 Thunder. Lightning. Floods. School cancelled. Bombs, shooting, and lock down all over the television. Sometimes you just have to bury your head in cinnamon sugar and whip up the churros. File this one under #distractionbydeepfrying.


 Churros with Chocolate Sauce
adapted from Yum Food and Fun for Kids
For the churros
2 cups all-purpose flour
1 tsp kosher salt
1 & 1/3 cups granulated sugar, divided
4 tbsp canola oil plus 2 quarts for frying
2 tsp ground cinnamon
For the chocolate sauce
4 ounces high quality chocolate, chopped
1/3 cup heavy cream

 Pour 2 quarts of canola oil into a deep pot and heat to 375 degrees.
 Carefully pipe strips of dough into the hot oil. Turn and fry until golden brown, about one minute. Drain on paper towels.
In a bowl or zip top plastic bag, combine the remaining sugar and cinnamon. While the churros are still warm, add them to the cinnamon sugar mixture and toss or shake to coat.
 Serve with chocolate sauce (below).
 To make the chocolate sauce, combine the chocolate and cream in a microwave-safe bowl. Heat in 30 second intervals until chocolate is melted and pliable. Whisk the chocolate into the cream until thick and delicious. Serve alongside hot churros.


adapted from Yum Food and Fun for Kids
For the churros
2 cups all-purpose flour
1 tsp kosher salt
1 & 1/3 cups granulated sugar, divided
4 tbsp canola oil plus 2 quarts for frying
2 tsp ground cinnamon
For the chocolate sauce
4 ounces high quality chocolate, chopped
1/3 cup heavy cream
Combine 2 cups of water, salt, 1/4 cup of sugar, and 4 tbsp oil in a large pot. Bring to a boil over medium heat. Once the mixture boils, pull it off the heat. Stir in the flour until the dough pulls together and cools slightly.

Scoop the dough into a pastry bag. If you have a lovely star shaped tip, this is the time to use it. Your churros will be extra lovely and have that characteristic striated look. If you don't have a star tip, or like me, you do have a star tip but can't seem to find it amidst the kitchen drawer chaos, just go ahead and snip the tip off the bag. Round churros taste super too, trust me.


In a bowl or zip top plastic bag, combine the remaining sugar and cinnamon. While the churros are still warm, add them to the cinnamon sugar mixture and toss or shake to coat.


 |
| What chocolate? |
Thursday, April 18, 2013
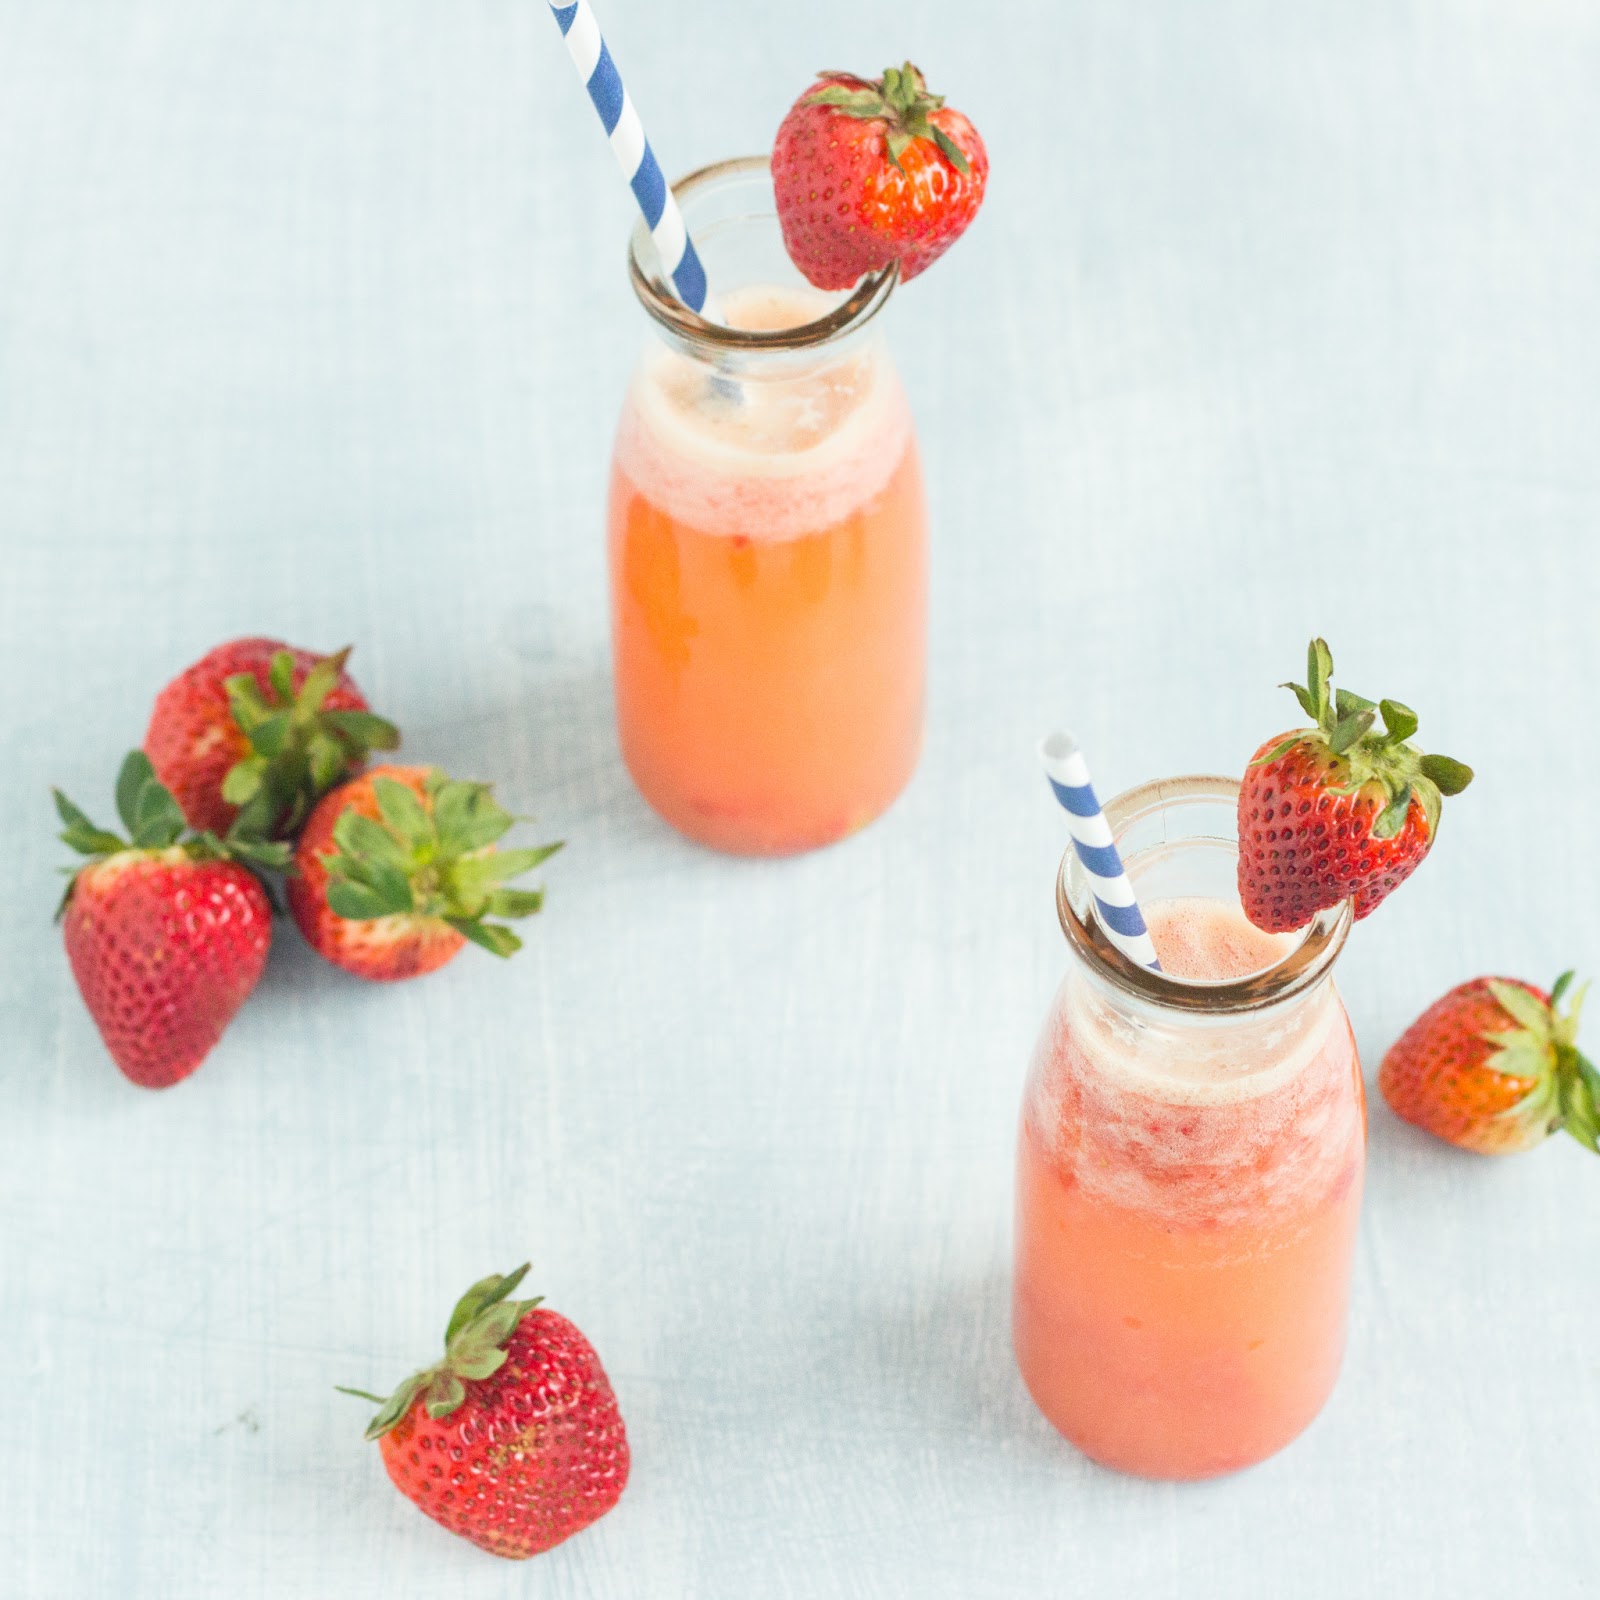
Strawberry Sparkle Juice
Amidst my cookbook habit and penchant for Pinterest recipes, sometimes I need to take a step back and remember what this blog is all about. Food is always on my brain. I love trying out new recipes and sharing old family favorites here on Kid Cultivation. I get all worked up over taking a truly decent food photograph. But really, truly, when it all comes down to it, the reason this blog exists is because of three inquisitive, discerning, droll little beings, none more than 4 feet tall.
 Bean received this sweet cookbook for her birthday last month. And it is a cute book, conveniently partitioned into age-based sections with varying degrees of recipe complexity and likelihood of flesh wounds and third degree burns. She was immediately drawn to a cheery pink fruity beverage and wanted to make it. Now.
 And here's the ugly truth. I didn't want to make it.
All it involved was hulling and crushing strawberries to a pulp, pouring in some orange juice, a splash of seltzer and stirring. Any reasonable and not otherwise occupied parent, I'm sure, would have succumbed immediately to the sweet request which came complete with a please and a smile. But it was the witching hour...homework to be done, laundry to be folded, dinner to be made, piano to be practiced, lunchboxes to be unpacked, washed, and repacked. I didn't feel like splattering strawberry juice all over the counters.
But I did. I fought my very grown-up (and totally not fun) urge to pull out the blender and whip it up in 20 seconds for her and instead pulled out the bowls, measuring cups and potato masher. And of course she loved every second of it. Sometimes practical and efficient are not the words of the day. Sometimes we just need to make a mess. Thanks for the reminder, Bean.
Strawberry Sparkle Juice
adapted from Cook School
2 cups fresh, ripe strawberries
1 cup orange juice
1 cup seltzer (or plain water for the bubble-averse)
Rinse the berries and place in a large bowl. Use a potato masher to grind them to a pulp.

 Use a sieve to strain the strawberry juice into a pitcher or second bowl.
 Pour in the orange juice and seltzer (or water). Stir gently and pour into glasses. Drink her down!
 Once I got over myself, Bean's project turned out to be the perfect after school activity. I mean, just check out Roo's enthusiasm.
 Forget two thumbs up, that's two arms and two legs up!! They were so excited and pleased with themselves for doing it all on their own. Totally worth the 15 minutes of mashing and washing dishes.
 Go ahead. Make the mess. Your kids will thank you.
All it involved was hulling and crushing strawberries to a pulp, pouring in some orange juice, a splash of seltzer and stirring. Any reasonable and not otherwise occupied parent, I'm sure, would have succumbed immediately to the sweet request which came complete with a please and a smile. But it was the witching hour...homework to be done, laundry to be folded, dinner to be made, piano to be practiced, lunchboxes to be unpacked, washed, and repacked. I didn't feel like splattering strawberry juice all over the counters.
But I did. I fought my very grown-up (and totally not fun) urge to pull out the blender and whip it up in 20 seconds for her and instead pulled out the bowls, measuring cups and potato masher. And of course she loved every second of it. Sometimes practical and efficient are not the words of the day. Sometimes we just need to make a mess. Thanks for the reminder, Bean.
 |
| Hulling some berries |
adapted from Cook School
2 cups fresh, ripe strawberries
1 cup orange juice
1 cup seltzer (or plain water for the bubble-averse)
Rinse the berries and place in a large bowl. Use a potato masher to grind them to a pulp.


Monday, April 15, 2013
Egg-Free Sunbutter Whirligig Cookies
Whirligig. Say it with me. Whirligig. See, you're having fun already!
 I can never seem to bake just a few cookies. A double batch, sure, but who halves a cookie recipe?! Not me.
Inevitably though, after an initial warm out of the oven raid, Mufasa backs way off the cookie consumption. The munchkins, while avid cookie enthusiasts, possess stomachs the size of coin purses and are typically satiated at a one cookie per day rate. That leaves me, gluttonous martyr I am, to do the dirty work. I suffer my way through 3 dozen cookies threatening staleness if I wait too long to put them in my mouth. That, friends, is the hair shirt I wear.
But, oddly, despite strict self-imposed rationing on my end, this batch of whirligigs seems to be disappearing at a steady clip. That can only mean one thing. These suckers are good!
 Whirligigs are not the easiest cookies to make. Nor are they the fastest, but don't be put off by the number of steps. Yes, they take a little time and a little nurturing, but stay the course. The reward of soft, chewy, nutty without the nuts, swirly, twirly, whirly cookies is totally worth it.
Egg-Free Sunbutter Whirligig Cookies
adapted from Baked Elements by Matt Lewis and Renato Poliafito
For the cookie dough
2&1/4 cups all-purpose flour
3/4 tsp baking powder
1/2 tsp baking soda
1 tsp salt
6 ounces (1&1/2 sticks) butter
1 cup packed brown sugar
1/2 cup granulated sugar
3 tbsp canola oil
1 cup creamy Sunbutter
3 tsp Ener-G Egg Replacer well mixed with 3 tbsp water
2 tsp real vanilla extract
Parchment paper
For the chocolate filling
12 ounces best-quality dark chocolate
1/2 tsp light corn syrup
To make the Sunbutter dough:
Whisk together the flour, baking powder, baking soda, and salt in a large bowl. Set aside.
Beat the butter, both sugars, oil, and Sunbutter on medium speed for about 5 minutes until light. Add the prepared egg replacer and vanilla and beat again until everything is well incorporated. Don't forget to scrape down the sides and bottom of the bowl in between mixing.
Add half the flour mixture to the wet ingredients and beat again until just combined. Add remaining flour mixture and beat again. Try not to mix more than necessary at this point.
Dump the dough onto a lightly floured work surface and press into a disk shape. Wrap the dough first in parchment paper, then cover the whole thing in a layer of plastic wrap. Refrigerate for at least 3 hours and up to 24 hours.
Now you're ready to roll!
 Remove the dough from the refrigerator. Line a large work surface with a sheet of parchment paper. Dust the parchment paper lightly with flour. Break the dough disk in half. Use a rolling pin to roll half the dough out into a rectangle approximately 9 inches x 7 inches and 1/2-inch thick. Don't worry if it's not perfect, but don't roll the dough too thin. If your dough is very soft and pliable at this point, place the rolled out rectangle back in the fridge to firm up a bit. My dough was quite firm already so I skipped this step. Repeat the process with the remaining half of dough.
 Next, make the chocolate filling. Melt the chocolate and corn syrup together in the microwave in 20 second intervals, stirring in between, until smooth. Paint, pour, or spread the chocolate over the rolled out dough, leaving a 1/2-inch border free of chocolate along one long edge.
 Take a deep breath. Starting at the long, chocolate-covered edge, use the parchment paper to help you lift the edge and start rolling the dough into a log. You should be rolling toward the edge with a chocolate-free border. It's probably obvious, but just in case, make sure the parchment remains on the outside of the cookie dough unless you want paper in your cookies.
Take your time and try not to freak out of things don't do exactly as planned. If the dough cracks, gently press the crack back together with your fingers. If the chocolate starts oozing out the ends, great. You know you used enough chocolate. And if your dough snaps apart mid-roll like this...
 pour yourself a cocktail and carry on, rolling the broken dough right into the center of the cookie roll. Repeat the process with the other half of the dough. Eventually, you'll end up with something along these lines.
 Have I mentioned that I am not a perfectionist? These are whimsical cookies. Expect a little mess. Wrap the dough logs in plastic wrap and refrigerate again, for at least 3 hours and up to a full day.
 Preheat the oven to 350 degrees. Line a couple of baking sheets with more parchment paper. Unwrap a chilled cookie log and place on a cutting surface. Using a very sharp or serrated knife dipped in hot water, slice the log into 1/2-inch thick rounds. After much trial and error, I found a small, serrated knife dipped in hot water between each and every cut worked best for me. Repeat with the second log and place the cookies on the prepared baking sheet.
 Bake 10-13 minutes, rotating the trays halfway through bake time. They're done when you see the first hint of brown start to form. Remove from oven. Cool on the baking sheets for 5 minutes then transfer the cookies to wire racks to cool completely.
They'll keep for a few days tightly covered...if they last that long!


Inevitably though, after an initial warm out of the oven raid, Mufasa backs way off the cookie consumption. The munchkins, while avid cookie enthusiasts, possess stomachs the size of coin purses and are typically satiated at a one cookie per day rate. That leaves me, gluttonous martyr I am, to do the dirty work. I suffer my way through 3 dozen cookies threatening staleness if I wait too long to put them in my mouth. That, friends, is the hair shirt I wear.
But, oddly, despite strict self-imposed rationing on my end, this batch of whirligigs seems to be disappearing at a steady clip. That can only mean one thing. These suckers are good!

Egg-Free Sunbutter Whirligig Cookies
adapted from Baked Elements by Matt Lewis and Renato Poliafito
For the cookie dough
2&1/4 cups all-purpose flour
3/4 tsp baking powder
1/2 tsp baking soda
1 tsp salt
6 ounces (1&1/2 sticks) butter
1 cup packed brown sugar
1/2 cup granulated sugar
3 tbsp canola oil
1 cup creamy Sunbutter
3 tsp Ener-G Egg Replacer well mixed with 3 tbsp water
2 tsp real vanilla extract
Parchment paper
For the chocolate filling
12 ounces best-quality dark chocolate
1/2 tsp light corn syrup
To make the Sunbutter dough:
Whisk together the flour, baking powder, baking soda, and salt in a large bowl. Set aside.
Beat the butter, both sugars, oil, and Sunbutter on medium speed for about 5 minutes until light. Add the prepared egg replacer and vanilla and beat again until everything is well incorporated. Don't forget to scrape down the sides and bottom of the bowl in between mixing.
Add half the flour mixture to the wet ingredients and beat again until just combined. Add remaining flour mixture and beat again. Try not to mix more than necessary at this point.
Dump the dough onto a lightly floured work surface and press into a disk shape. Wrap the dough first in parchment paper, then cover the whole thing in a layer of plastic wrap. Refrigerate for at least 3 hours and up to 24 hours.
Now you're ready to roll!


Take your time and try not to freak out of things don't do exactly as planned. If the dough cracks, gently press the crack back together with your fingers. If the chocolate starts oozing out the ends, great. You know you used enough chocolate. And if your dough snaps apart mid-roll like this...


They'll keep for a few days tightly covered...if they last that long!

Friday, April 12, 2013
Radishes in Brown Butter with Lemon
Radishes are so pretty. The vibrant purplish pink really works to their advantage with my pink and purple-loving crew.
 The KC kids generally prefer their radishes crisp, raw and thinly sliced and I admit, that's not a half bad way to enjoy them. But beyond salads and the crudite platter, here's a simple, delicious way to showcase radishes in all their springy pink and purple glory.

 Radishes in Brown Butter with Lemon
adapted slightly from Cooking Light
2 bunches radishes, including greens
1 tbsp butter
1/2 tsp fresh lemon zest
2 tsp fresh lemon juice
1/4 tsp salt
1/2 tsp sugar
1/2 tsp black pepper
Trim the greens from the radishes, leaving about one inch of stem attached to the bulb. Halve the smaller radishes. Quarter larger ones. Wash the greens and spin dry in a salad spinner. Roughly chop the greens.
Bring a large pot of water to a boil. Add radishes (not the greens!) and simmer until crisp tender...about 3 or 4 minutes. Drain and dry the radishes on a towel.
Melt the butter in a medium saucepan or skillet over medium-high heat. Add the radishes and saute for a few minutes until the butter starts to brown. Add the lemon juice, zest, salt, and sugar and cook one minute more. Remove the pan from heat. Stir in the radish greens and plenty of black pepper.

Tuesday, April 9, 2013
Egg-Free, Nut-Free Oatmeal Chocolate Chip Sunflower Seed Cookies
Almost 15 years ago (how did that happen?!) my sister introduced us to her famous oatmeal, chocolate chip, pecan cookies. We were never the same. Mufasa immediately proclaimed them to be the only cookies on earth worth eating. You might have noticed Mufasa makes a lot of proclamations.
Then came Roo. Sweet, clever, cuddly, hilarious, exuberant, sometimes exasperating Roo, complete with a slew food allergies and well, there went our pecan cookies. We've been trying to come to terms with it ever since.
 More than the flawless toasty, nutty, chocolatey, brown sugary essence that is everything a cookie should be, it was the texture of those cookies that really got you. They literally burst with chewy oatmeal to satisfy the molars, gooey chocolate for the tongue, and lots and lots of crunchy, salty nuts.
 Nuts are a no no here in the KC house these days, but seeds, we really like seeds. Sunflower seeds in particular are a house favorite. Here they work together with rolled oats and chocolate chips to really amp up the texture of my nut-free, egg-free version of the best cookies on earth. Just ask Mufasa.
These are substantial cookies and this, my friends, is no time for restraint. Do not, under any circumstances, skimp on the chocolate chips, oatmeal, or sunflower seeds.
 Oatmeal Chocolate Chip Sunflower Seed Cookies
2 & 1/4 cups all purpose flour (do not sift!)
1 tsp baking soda
1/2 tsp salt
1 cup butter, softened
3/4 cup granulated sugar
3/4 cup brown sugar, packed
2 tsp real vanilla extract
3 tsp Ener-G Egg Replacer whisked and well mixed with 4 tbsp water
1 tbsp softened cream cheese
1 & 1/2 cup rolled oats
2 cups chocolate chips (we like big, dark ones like these)
3/4 cup hulled sunflower seeds
Preheat the oven to 375 degrees. Combine the flour, baking soda, and salt. Whisk to combine.
In a separate large bowl, beat the butter and sugars until creamy. Add the vanilla, egg replacer mixture, and cream cheese and continue to beat until well combined.
Add the flour mixture to the wet ingredients, 1/3 at a time, mixing well between additions. Add the oatmeal and mix again. Stir in the chocolate chips and sunflower seeds. Drop by tablespoon onto parchement-lined cookie sheets (or line them with Silpat mats) and bake 9-11 minutes until lovely, fragrant, and golden brown.
Makes about 4 dozen cookies.

Then came Roo. Sweet, clever, cuddly, hilarious, exuberant, sometimes exasperating Roo, complete with a slew food allergies and well, there went our pecan cookies. We've been trying to come to terms with it ever since.


These are substantial cookies and this, my friends, is no time for restraint. Do not, under any circumstances, skimp on the chocolate chips, oatmeal, or sunflower seeds.

2 & 1/4 cups all purpose flour (do not sift!)
1 tsp baking soda
1/2 tsp salt
1 cup butter, softened
3/4 cup granulated sugar
3/4 cup brown sugar, packed
2 tsp real vanilla extract
3 tsp Ener-G Egg Replacer whisked and well mixed with 4 tbsp water
1 tbsp softened cream cheese
1 & 1/2 cup rolled oats
2 cups chocolate chips (we like big, dark ones like these)
3/4 cup hulled sunflower seeds
Preheat the oven to 375 degrees. Combine the flour, baking soda, and salt. Whisk to combine.
In a separate large bowl, beat the butter and sugars until creamy. Add the vanilla, egg replacer mixture, and cream cheese and continue to beat until well combined.
Add the flour mixture to the wet ingredients, 1/3 at a time, mixing well between additions. Add the oatmeal and mix again. Stir in the chocolate chips and sunflower seeds. Drop by tablespoon onto parchement-lined cookie sheets (or line them with Silpat mats) and bake 9-11 minutes until lovely, fragrant, and golden brown.
Makes about 4 dozen cookies.

Don't forget the milk!
Friday, April 5, 2013
Sugar Snap Slaw with Miso Dressing
Sugar snap peas are having a moment. Everywhere I look someone is slicing, dicing, or chomping on crisp emerald sugar snaps. Some of us are even mixing a few into spicy black rice salad!
The KC kiddos love sugar snaps but let's talk cabbage for a moment. I often lament Looly's late emergence picky eating. The girl who once happily gummed avocados, artichoke hearts, salmon, and sirloin now subsists primarily on waffles, bread, and berries. But friends, at least we still have cabbage.
For whatever reason, Looly adores raw cabbage. Green, purple, it doesn't matter. Her enthusiasm is infectious to the point that Bean and Roo now complain if I miss their plates with a few crispy strips of coveted "slaw" too. I cannot complain about that.
 For all their love of cabbage, the 6-and-unders here have zero in salad dressing. It doesn't matter. Let them munch their raw sugar snaps and cabbage ribbons. As usual, I set aside a deconstructed version of slaw for them - really just fresh cabbage, slices of sugar snap peas, and a few radishes, which they (perhaps oddly) also seem to enjoy. That means more yummy dressing for me. More for you.
 Sugar Snap Slaw with Miso Dressing
adapted from The Smitten Kitchen Cookbook
For the dressing
1 tbsp minced fresh ginger
2 cloves garlic, minced
2 tbsp fresh miso (mild yellow or white)* plus more to taste
2 tbsp tahini
1 tbsp honey
1/4 cup rice vinegar
2 tbsp toasted sesame oil
2 tbsp sunflower or grapeseed oil
Throw all of the dressing ingredients in a blender and mix until you have a thick, creamy, delicious puree. Alternatively, place all the ingredients in medium cylindrical container (like those that often come with an immersion blender) and whip to perfection with a handheld blender.
* Find fresh miso in the refrigerated section of most well-stocked grocery stores
For the Salad
1/2 pound sugar snap peas, washed and sliced on a diagonal**
1/2 pound cabbage, thinly sliced
4-6 radishes, cut into matchsticks
3-4 scallions, thinly sliced
3 tbsp toasted sesame seeds (you can toast your own or buy them already toasted, like I did)
Toss all of the salad ingredients together, reserving 1 tbsp sesame seeds. Pour your desired amount of dressing over the top and toss everything together. Top with the remaining 1 tbsp sesame seeds.
You will likely have more dressing than you'll need for the slaw. Keep the extra in the fridge and it will last several days. It makes a super tasty dip for just about any crunchy veg you can think of...carrots, radishes, cucumbers, peppers, green beans, baby corn, kale chips, you name it.
**In her cookbook, Deb Perelman says to blanch the sugar snaps, but I don't find it necessary. They're lovely and delicious raw or blanched so my philosophy is, why add a step? If you prefer your veggies more tender, go ahead and blanch the peas for a couple of minutes before slicing. I skip it.

The KC kiddos love sugar snaps but let's talk cabbage for a moment. I often lament Looly's late emergence picky eating. The girl who once happily gummed avocados, artichoke hearts, salmon, and sirloin now subsists primarily on waffles, bread, and berries. But friends, at least we still have cabbage.
For whatever reason, Looly adores raw cabbage. Green, purple, it doesn't matter. Her enthusiasm is infectious to the point that Bean and Roo now complain if I miss their plates with a few crispy strips of coveted "slaw" too. I cannot complain about that.


adapted from The Smitten Kitchen Cookbook
For the dressing
1 tbsp minced fresh ginger
2 cloves garlic, minced
2 tbsp fresh miso (mild yellow or white)* plus more to taste
2 tbsp tahini
1 tbsp honey
1/4 cup rice vinegar
2 tbsp toasted sesame oil
2 tbsp sunflower or grapeseed oil
Throw all of the dressing ingredients in a blender and mix until you have a thick, creamy, delicious puree. Alternatively, place all the ingredients in medium cylindrical container (like those that often come with an immersion blender) and whip to perfection with a handheld blender.
* Find fresh miso in the refrigerated section of most well-stocked grocery stores
For the Salad
1/2 pound sugar snap peas, washed and sliced on a diagonal**
1/2 pound cabbage, thinly sliced
4-6 radishes, cut into matchsticks
3-4 scallions, thinly sliced
3 tbsp toasted sesame seeds (you can toast your own or buy them already toasted, like I did)
Toss all of the salad ingredients together, reserving 1 tbsp sesame seeds. Pour your desired amount of dressing over the top and toss everything together. Top with the remaining 1 tbsp sesame seeds.
You will likely have more dressing than you'll need for the slaw. Keep the extra in the fridge and it will last several days. It makes a super tasty dip for just about any crunchy veg you can think of...carrots, radishes, cucumbers, peppers, green beans, baby corn, kale chips, you name it.
**In her cookbook, Deb Perelman says to blanch the sugar snaps, but I don't find it necessary. They're lovely and delicious raw or blanched so my philosophy is, why add a step? If you prefer your veggies more tender, go ahead and blanch the peas for a couple of minutes before slicing. I skip it.

Subscribe to:
Posts (Atom)