Showing posts with label frozen. Show all posts

Thursday, June 27, 2013

Vanilla Berry Frozen Yogurt Pops

Summertime. Otherwise known on our back deck as popsicle season. Icy treats go fast around here - like multiple times a day fast. I can't really blame the little blue-tongued bandits. Popsicles are awesome. They're nice to look at, fun to eat, sweet, cold, refreshing, satisfying, and thirst-quenching all in one cute little party of a package. The red, white, and blue ones scream 4th of July.

Of course the astronomical sugar content and food dyes in most grocery store brands leave something to be desired, but who needs them anyway? Assuming you have a freezer in the vicinity, homemade popsicles are just about the easiest thing in the world to make with kids. 
Fruit juices and purees, frozen bananas, lemonade, coconut milk and yogurt, preferably chunked up with plenty of fresh fruit, all make for amazing popsicles with less than half the parental guilt (as evidenced by my own personal and totally unscientific study) of grocery store brands. So go ahead. Embrace the stick this summer. Bonus points if you serve these red, white, and bluish frozen yogurt pops for the 4th of July.
We opted to use Stoneyfield Organic Greek Fat Free Yogurt but low fat or full fat plain Greek yogurt would work well too.
Despite what my little ham of a son would lead you to believe, Stoneyfield did not sponsor this post. I paid for my own yogurt fair and square, though I do admit to using a coupon to cover part of the cost of the Wholesome Sweeteners Organic Blue Agave we're going to talk about in a minute.
I like to use agave here rather than honey because of its thinner, runnier consistency. The agave swirls into the yogurt effortlessly for uniform sweetness throughout the pops. We used Wholesome Sweeteners Organic Blue Agave and pure vanilla extract since that's what I had on hand. If you are so inclined you could save yourself a step, skip the vanilla and use Wholesome Sweeteners Organic Vanilla Blue Agave Syrup instead of plain.
Vanilla Berry Frozen Yogurt Pops

16 ounces plain Greek yogurt
4-6 tbsp Wholesome Sweeteners Organic Blue Agave
2 tsp real vanilla extract
1&1/2 cups raspberries and/or blackberries, fresh or frozen

In a small bowl, stir together the yogurt and 2-3 tbsp of the agave, depending on how sweet you like your pops. At this point the yogurt should taste slightly sweeter than you want it. The flavor will mellow once it's frozen. Set aside.

In a separate bowl, mash the berries with a fork. Stop when you still have some chunks of whole berry and plenty of bright, colorful juice. Stir in the remaining 2-3 tbsp agave.

In popsicle molds (or paper cups if you don't have popsicle molds) layer the yogurt and berry mixtures, starting and ending with yogurt. Use a chopstick or anything with a slim, long handle to gently swirl the yogurt and berries together in the mold. Insert the sticks and freeze for at least 4 hours and up to several days.

To release the pops from the mold, run them under cool to lukewarm water for about 30 seconds and gently wiggle out of the mold.

Makes 5 large pops.

Happy 4th!

Saturday, March 2, 2013

Strawberry Ricotta Scones

One sweltering and blindingly sunny summer day an eternity ago, we went strawberry picking. After shortcakes, smoothies, balsamic strawberry jam with cracked pepper, and much strawberry limeade, we ended up with about 5 pounds of berries in the freezer, where they've been hanging out gathering ice crystals ever since. Obviously, it's time to use them before the next strawberry season rolls around, but any old smoothie won't do for these conserved nibble-size beauts. Hard-earned berries require something special.
A few months ago I made these egg-free Blackberry Meyer Lemon Ricotta Scones and I haven't been able to shake their legacy since. Is there a better place to nestle sweet tender summer berries in the dead of winter than in between flaky warm layers of whole wheat ricotta scones? I for one think not.
Strawberry Ricotta Scones
adapted from The Smitten Kitchen Cookbook

1 cup whole wheat flour
1 cup all-purpose flour
1 tbsp baking powder
1/3 cup sugar*
1/2 tsp kosher salt
6 tbsp cold, unsalted butter
1 cup strawberries (fresh or frozen), coarsely chopped
3/4 cup ricotta cheese
1/3 cup buttermilk

*I upped the sugar just a tad from the original recipe because well, I like sugar, but what I really mean to say is that it offsets the tartness of these particular strawberries. Let your berries be your guide and if yours are particularly sweet, feel free to reduce down to 1/4 cup of sugar.

Preheat the oven to 425 degrees and line a baking sheet with a Silpat mat or parchment paper.

In a large bowl, whisk together both flours, baking powder, sugar, and salt. Using a pastry blender or 2 forks, cut the cold butter into the flour mixture until the largest bits are about the size of a small pea. Be patient. It will happen.
Chop the berries coarsely (some big hunks are good!) and add to the flour mixture. Stir to combine.
Add the ricotta and buttermilk all at once. Stir with a rubber spatula until just combined. Knead the dough a few times with your hands then dump it out onto a well-floured surface. Pat the dough into a round about 2 inches high. You can add a little more flour to the top of the dough to prevent it from sticking to your hands if it's super sticky.
Use a sharp knife and a steady hand to slice the round into 8 even wedges. Carefully transfer each wedge to the prepared baking sheet.
Bake 15-18 minutes until the scones are golden brown and dry and crisp at the edges. Remove the pan from the oven and allow to cool for a few minutes before transferring the scones to a wire rack to cool completely.
If you really want to do it up, serve them alongside balsamic strawberry jam with cracked pepper or vanilla mascarpone cream. May the sweet flavor sustain you until the return of berry season!

Monday, January 21, 2013

Frozen Yogurt Drops

You need to make these. Seriously, make them right now. I'm betting you already have everything you need in the fridge. If you take 5 minutes now, they'll be ready by the time your kids get home from school, and you, my friend, will be sitting pretty on that pedestal reserved for Superstar Parent of the Week. You can thank me later.
On that day you're feeling guilty because you don't have time for paper mache butterfly crafts and building marble runs, you will make these. When you can't steal 15 minutes to read the next installment of the Boxcar Children to your twins because they don't want their sister to read it out loud to them they want you to read it out loud, you will make these. When the kids are asking, what are we going to do today while you need an oil change, have 15 emails to answer, grocery shopping to do, a school fundraising meeting, and a workout to fit in? That's the day you're going to make these. And everyone's going to wind up happy.

Here's the drill:
Pull some yogurt out of the fridge. See, I told you you already have everything you need! Any flavored yogurt will do, full fat, no fat, some fat, Greek, vanilla, strawberry, pineapple, goji berry papaya coconut swirl, pretty much anything but plain.

Now, and this part is purely optional, stir a drop of food coloring into the yogurt. I used orange for mango, yellow for pineapple, purple for blueberry, you get the idea. It's totally unnecessary but if you want to jazz things up and have some food coloring on hand, I say go for it. Who can't use a little extra color in mid-January?
Scoop each flavor of yogurt into a plastic baggie. Snip a corner off each bag with scissors and pipe bite size rounds onto a sheet pan.
Don't like using plastic bags? Fear not. Just use a teaspoon and drop dollops onto a tray like you would cookie dough instead.
Now put them in the freezer for a couple of hours. When they're frozen solid, pop them off the pan with a spatula (if like me, you require said pan for dinner) and toss them into a clean plastic freezer bag or other container and keep them frozen until you're ready to serve. That's it!
Super cute, healthful, crazy delicious to snack on while blogging doing homework and preposterously easy!
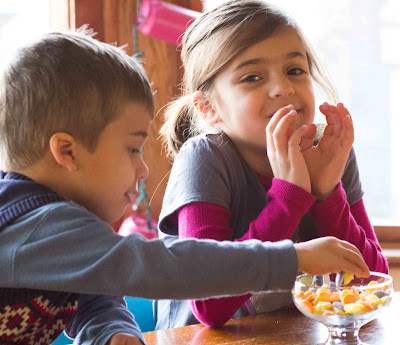
Kids seem to like them.
But make some extra for the grown ups!

Friday, July 6, 2012

Frozen Banana Sundae Pops and Chocolate Pretzel Coconut Bark

Given the recent slew of triple digit temperatures, we can't eat our ice cream fast enough. After losing one too many scoops to the deck monster who yanks them off cones every time I turn my back, we decided to give frozen bananas a try. Slower melt time, nice creamy texture, a few additional nutrients, dark chocolate coating and we could choose our own toppings!
I skewered bananas, froze them for a bit, dipped them in melted dark chocolate and handed them off to the troops who slathered them in crushed pretzels, freeze dried strawberries, rainbow sprinkles, graham cracker crumbs, and flaky coconut. I meant to take pictures of that part but a giant bowl of melted chocolate and six little hands didn't lend itself to a leisurely photo shoot. So, you get the finished product instead.
Frozen Banana Sundae Pops
(serves 10)

5 large, firm bananas
1 10-ounce package chocolate chips
10 skewers or Popsicle sticks
Assorted toppings of your choice. We used rainbow sprinkles, graham cracker crumbs, crushed pretzels, freeze-dried strawberries, and flaked coconut but the options are endless (M&Ms, white chocolate chips, crushed cookies, mini marshmallows, candy corn, popcorn, nuts, crushed saltine crackers, hot cinnamon candies, crushed candy canes, you  name it!)

1. Peel the bananas and cut them in half crosswise. Skewer the bananas and place on a parchment lined baking sheet in the freezer for an hour so they'll be nice and firm for dipping. Crush graham crackers, cookies, or pretzels in plastic baggies using a mallet (great kid job) and lay each topping out on a plate.
2. When the bananas are firm, pour the chocolate chips into a microwave-safe bowl and heat in 20 second intervals, stirring often, until melted. Carefully dip bananas one at a time and coat with desired toppings. Return to parchment-lined baking sheet and freeze until hard, about 2 hours.
The coconut was a revelation for the girls who up to this point had flat out rejected it on top of granola, in cookies, and anywhere else they encountered it. Suddenly they couldn't get enough and emptied our topping bowl before the bananas were done. For a minute there Looly truly believed she'd discovered the epic combo of coconut and chocolate.

Roo, for the record, did sample a coconut flake but the texture was too much for him and he spit it out. And sadly, we had another sprinkles incident you can read about here. For few moments, though, he was totally digging his banana.
All tasty indeed but the real star of the show turned out to be the frozen chocolate pretzel coconut bark I made with the leftovers. As tasty as any candy bar and so incredibly easy!
Chocolate Pretzel Coconut Bark

1 bag chocolate chips (we used Ghiradelli Bittersweet Baking Chips)
1 cup pretzels, any shape, crushed or chopped
1/2 cup flaked coconut

Melt the chocolate chips in a microwave-safe bowl, heating in 20 second intervals and stirring in between until just melted. Lay a piece of parchment paper on a rimmed baking sheet. Sprinkle half the pretzels on the parchment. Pour chocolate over the pretzels. Top with remaining pretzels and sprinkle coconut on top. Place baking sheet in the freezer for an hour or more. Remove and break chocolate bark into pieces. Store in the freezer for an extra refreshing summer treat.