Showing posts with label no egg. Show all posts

Monday, April 15, 2013

Egg-Free Sunbutter Whirligig Cookies

Whirligig. Say it with me. Whirligig. See, you're having fun already!
I can never seem to bake just a few cookies. A double batch, sure, but who halves a cookie recipe?! Not me.

Inevitably though, after an initial warm out of the oven raid, Mufasa backs way off the cookie consumption. The munchkins, while avid cookie enthusiasts, possess stomachs the size of coin purses and are typically satiated at a one cookie per day rate. That leaves me, gluttonous martyr I am, to do the dirty work. I suffer my way through 3 dozen cookies threatening staleness if I wait too long to put them in my mouth. That, friends, is the hair shirt I wear.

But, oddly, despite strict self-imposed rationing on my end, this batch of whirligigs seems to be disappearing at a steady clip. That can only mean one thing. These suckers are good!
Whirligigs are not the easiest cookies to make. Nor are they the fastest, but don't be put off by the number of steps. Yes, they take a little time and a little nurturing, but stay the course. The reward of soft, chewy, nutty without the nuts, swirly, twirly, whirly cookies is totally worth it.

Egg-Free Sunbutter Whirligig Cookies
adapted from Baked Elements by Matt Lewis and Renato Poliafito

For the cookie dough

2&1/4 cups all-purpose flour
3/4 tsp baking powder
1/2 tsp baking soda
1 tsp salt
6 ounces (1&1/2 sticks) butter
1 cup packed brown sugar
1/2 cup granulated sugar
3 tbsp canola oil
1 cup creamy Sunbutter
3 tsp Ener-G Egg Replacer well mixed with 3 tbsp water
2 tsp real vanilla extract
Parchment paper

For the chocolate filling

12 ounces best-quality dark chocolate
1/2 tsp light corn syrup

To make the Sunbutter dough:

Whisk together the flour, baking powder, baking soda, and salt in a large bowl. Set aside.

Beat the butter, both sugars, oil, and Sunbutter on medium speed for about 5 minutes until light. Add the prepared egg replacer and vanilla and beat again until everything is well incorporated. Don't forget to scrape down the sides and bottom of the bowl in between mixing.

Add half the flour mixture to the wet ingredients and beat again until just combined. Add remaining flour mixture and beat again. Try not to mix more than necessary at this point.

Dump the dough onto a lightly floured work surface and press into a disk shape. Wrap the dough first in parchment paper, then cover the whole thing in a layer of plastic wrap. Refrigerate for at least 3 hours and up to 24 hours.

Now you're ready to roll!
Remove the dough from the refrigerator. Line a large work surface with a sheet of parchment paper. Dust the parchment paper lightly with flour. Break the dough disk in half. Use a rolling pin to roll half the dough out into a rectangle approximately 9 inches x 7 inches and 1/2-inch thick. Don't worry if it's not perfect, but don't roll the dough too thin. If your dough is very soft and pliable at this point, place the rolled out rectangle back in the fridge to firm up a bit. My dough was quite firm already so I skipped this step. Repeat the process with the remaining half of dough.
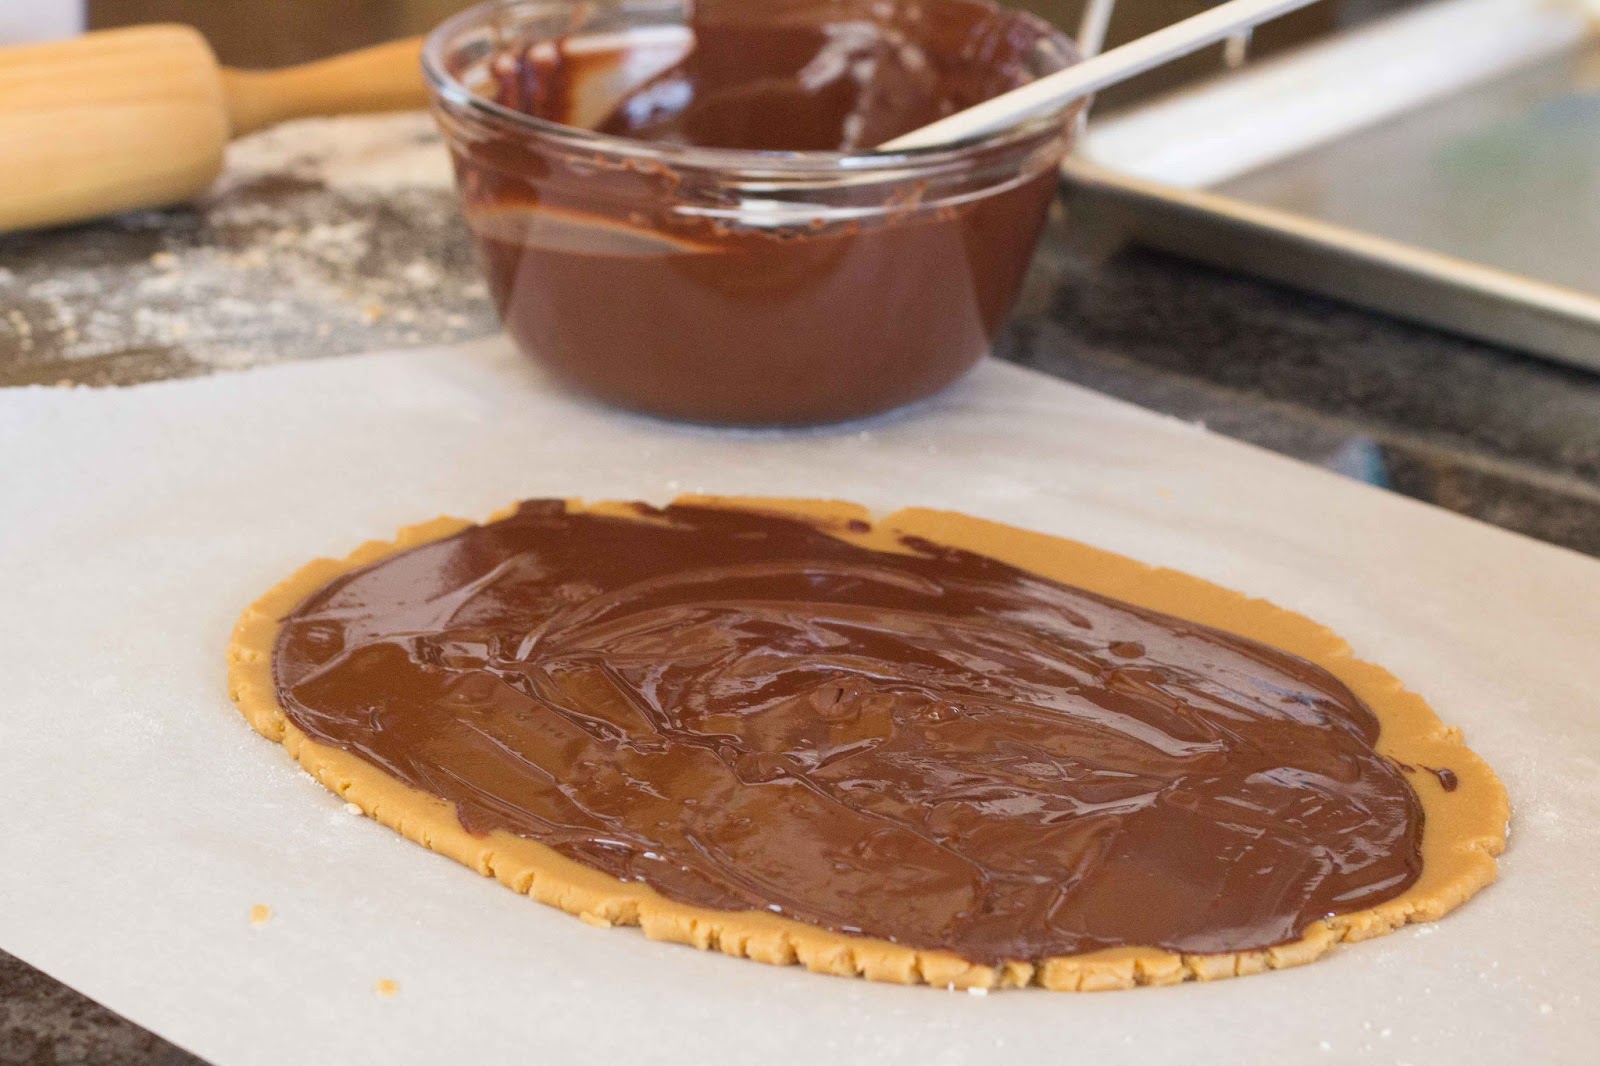
Next, make the chocolate filling. Melt the chocolate and corn syrup together in the microwave in 20 second intervals, stirring in between, until smooth. Paint, pour, or spread the chocolate over the rolled out dough, leaving a 1/2-inch border free of chocolate along one long edge.
Take a deep breath. Starting at the long, chocolate-covered edge, use the parchment paper to help you lift the edge and start rolling the dough into a log. You should be rolling toward the edge with a chocolate-free border. It's probably obvious, but just in case, make sure the parchment remains on the outside of the cookie dough unless you want paper in your cookies.

Take your time and try not to freak out of things don't do exactly as planned. If the dough cracks, gently press the crack back together with your fingers. If the chocolate starts oozing out the ends, great. You know you used enough chocolate. And if your dough snaps apart mid-roll like this...
pour yourself a cocktail and carry on, rolling the broken dough right into the center of the cookie roll. Repeat the process with the other half of the dough. Eventually, you'll end up with something along these lines.
Have I mentioned that I am not a perfectionist? These are whimsical cookies. Expect a little mess. Wrap the dough logs in plastic wrap and refrigerate again, for at least 3 hours and up to a full day.
Preheat the oven to 350 degrees. Line a couple of baking sheets with more parchment paper. Unwrap a chilled cookie log and place on a cutting surface. Using a very sharp or serrated knife dipped in hot water, slice the log into 1/2-inch thick rounds. After much trial and error, I found a small, serrated knife dipped in hot water between each and every cut worked best for me. Repeat with the second log and place the cookies on the prepared baking sheet.
Bake 10-13 minutes, rotating the trays halfway through bake time. They're done when you see the first hint of brown start to form. Remove from oven. Cool on the baking sheets for 5 minutes then transfer the cookies to wire racks to cool completely.

They'll keep for a few days tightly covered...if they last that long!

Friday, December 21, 2012

Chocolate Chip Shortbread Bars

Next stop on the holiday baking train: Chocolate. Chip. Shortbread.
 No nuts, no eggs, extra chocolate drizzled on top, this is Roo's kind of cookie. His mother's too.
You'll need a steady hand to cut the shortbread so it doesn't crumble, but once that part's done, you can enlist a slew of young chocolatiers to drizzle and dollop melted chocolate over the top.
Chocolate Chip Shortbread
adapted from Food Network Magazine, December 2012

1 cup (2 sticks) unsalted butter, room temperature
1 tsp vanilla extract
1/4 tsp salt
3/4 cup confectioners sugar
2 cups all purpose flour
1 & 1/2 cups bittersweet chocolate chips

1. Preheat the oven to 350 degrees. Line a 9x9-inch baking pan with foil. Leave a bit of an overhang on all sides. 
2. Use a mixer on medium speed to cream the butter, vanilla, and salt. Turn the mixer to low speed and beat in the confectioners' sugar until just incorporated. Add the flour in two parts, beating until smooth between and after each addition. Stir in half (3/4 cup) of the chocolate chips with a sturdy spoon. 
3. Using your hands, press the dough into the prepared pan. If necessary, you can dust your hands lightly with flour so the dough doesn't stick to them. Score the top of the dough with a knife to make 9 strips. Then score the strips into thirds to make 27 pieces. Bake about 40-45 minutes or until the edges are firm and the dough appears dry. 
4. Remove from oven and score over your knife marks once again. Cool 20 minutes in the pan. Gently lift the shortbread out of the pan using the edges of the foil to pull it out and cool completely on a wire rack. 
5. When completely cool, cut the shortbread into pieces using your score marks as a guide. Put the remaining 3/4 cups of chocolate chips into a microwave safe bowl and warm in 30 second intervals, stirring in between until melted. Use a spoon to drizzle melted chocolate over the top of the shortbread cookies and let stand until the chocolate is set, about 1 hour. 
Make sure to save some for Santa!

Sunday, November 18, 2012

Whole Wheat Blackberry and Meyer Lemon Ricotta Scones

Blackberry. Ricotta. Meyer lemons. Uh-huh.
I've been on the prowl for a superstar egg-free scone recipe for some time. Leave it to Deb Perelman, Smitten Kitchen food blogger extraordinaire and author of The Smitten Kitchen Cookbook to have my back. She has a luscious recipe for whole wheat raspberry ricotta scones (no eggs!) that has been calling my name since I stumbled upon it months ago.
Sadly, winter raspberries in Chicago always look like they've been pre-chewed by the time I get to them. And while still far from the plump farmers market jewels we get in August, November grocery store blackberries seem to hold up better to the wear and tear of stock boys and throngs of Thanksgiving shoppers. And the Meyer lemons? They were winking at me across the aisle, glinting their sunny skins right into my eyes, refusing to be ignored.

Whole Wheat Blackberry and Meyer Lemon Ricotta Scones
adapted from Smitten Kitchen

1 cup whole wheat flour
1 cup all-purpose flour
1 tbsp baking powder
1/3 cup granulated sugar*
1/2 tsp salt
6 tbsp cold, unsalted butter
1 cup fresh blackberries, lightly chopped into halves and quarters
1 Meyer lemon (or regular lemon), zest and juice
3/4 cup whole milk ricotta cheese
1/3 cup heavy cream

*The original recipe calls for 1/4 cup of sugar, but since I wasn't sprinkling any coarse sugar on top of these babies and I wanted to make sure the kiddos would love them, I upped it ever so slightly. 

1. Preheat the over to 425 degrees. Line a baking sheet with parchment paper. Whisk together the flours, baking powder, sugar, and salt. Using a pastry blender or 2 forks, cut the cold butter into the flour mixture until the biggest chunks are no larger than a small pea. This might take a few minutes. Be patient.
2. Add the chopped blackberries and lemon zest to the flour-butter mixture. Stir to combine.
3. Add the juice from the lemon, ricotta, and heavy cream all at once. Stir with a rubber spatula until just combined. Knead the dough a few times with your hands. Turn the dough out onto a floured surface and pat it into a circular mound.
4. Use a sharp knife and a steady hand to cut eight wedges and transfer to the prepared baking sheet.
5. Bake about 15 minutes until golden brown and crisp at the edges. Allow scones to cool on the pan for a few minutes then transfer to a cooling rack. These are best the day they are baked, but can be frozen and reheated in the oven in a pinch.
Ridiculous, right? These are so freakin' good. Looly polished one off before she took her coat off after school. I would have scolded her but the truth is that mine never even made it onto the cooling rack.
 I'm thinking cranberry-blood orange scones for Christmas morning. What do you think?

Sunday, October 14, 2012

Chewy, Gooey, Egg-Free Chocolate Chip Cookies

Ever since Roo's egg and nut allergies were diagnosed, I've been experimenting with dozens of recipes so that he can enjoy the same beloved baked goods as the rest of us. Okay, maybe he doesn't care that much about pancakes, muffins and cookies, but his mother and sisters do and we're all about inclusiveness over here.

Despite an abundance of allergy cookbooks, multiple boxes on Ener-G Egg Replacer, and a virtual family of allergy sufferers who share their own clever substitutions and recipes, one feat has remained maddeningly elusive: chewy chocolate chip cookies. 
Most of the egg-free recipes I've tried have been great right out of the oven, and as long as your willing to scarf down a dozen cookies in 10 minutes, everything's totally cool. But sadly, replacing the eggs seems to dictate that after 10 minutes of cooling time, egg-free cookies seize to a gingersnappy, tooth-rattling level of crunch. Maybe you're a dunker and that's not a problem for you, but I prefer my chocolate chip cookies a little on the chewy side - none of this crunchy, crumbly Chips Ahoy! business.
Fear not, my friends, the answer is near. So near in fact, you might already have it in your fridge. So simple and creamy, tangy and sweet. Cream cheese. It's not just for bagels.
Chewy, Gooey, Egg-Free Chocolate Chip Cookies

2 & 1/4 cups all purpose flour (do not sift!)
1 tsp baking soda
1/2 tsp salt
1 cup butter, softened
3/4 cup granulated sugar
3/4 cup brown sugar, packed
2 tsp real vanilla extract
3 tsp Ener-G Egg Replacer whisked and well mixed with 4 tbsp water
1 tbsp softened cream cheese
2 cups chocolate chips (we like big, dark ones like these)

1. Preheat the oven to 375 degrees. Combine the flour, baking soda, and salt. Whisk to combine.
2. In a separate large bowl, beat the butter and sugars until creamy. Add the vanilla, egg replacer mixture, and cream cheese and continue to beat until well combined.
3. Add dry ingredients to wet, 1/3 at a time, mixing well between additions. Stir in the chocolate chips. Drop by tablespoon onto ungreased cookie sheets (or line them with Silpat mats) and bake 9-11 minutes until lovely, fragrant, and golden brown.

Makes about 4 dozen cookies
My chewy gooey babies

Wednesday, October 10, 2012

Egg-Free Crispy Parmesan Chicken and Arugula Salad


Okay, excuse me for a moment but I am temporarily blinded by the cuteness that is this boy. Don't worry, it won't last long. It never does. Any minute there will be a defiant glance, a whine, a covert squeal-inducing pinch for a sister passing by. But for right now, in this moment, this boy, is super adorable, wonderfully agreeable, and to top it all off he's one heck of a chicken dredger. Screw egg allergies. Thanks to buttermilk, my boy can dredge.

Don't worry. Everybody gets their hands dirty.
Now, I've read the literature and I realize my kids are supposed to love chicken nuggets. They don't. I can't take credit for this since I have no idea what I did to incite their contempt for fast food. Honestly with the restaurant limits Roo's allergies place on us, I am not above a stop at the golden arches on a road trip if it means he can eat without going into anaphylactic shock. One health concern at a time, you know? Still, the KC kids would much prefer me to travel with a hunk of Parmesan cheese and a few apples in my purse than to suggest they eat nuggets for lunch.

So maybe your kids adore chicken nuggets, maybe they don't. That's really not the point. The point is, that this crispy crunchy golden chicken is way better than any old chicken nuggets. Whether they do or do not appreciate nuggets currently, if they go crazy for Parmesan cheese like mine do, they will likely enjoy this chicken. And bonus, it's one big nutritional step up from the ones you-know-who serves in a cardboard box. Use organic chicken, add a green salad, and you might as well start searching out wall space for your parent of the year plaque.
Looly teaching the art of finely grated Parmesan to a rapt audience
 Egg-Free Crispy Parmesan Chicken

1 cup buttermilk
1 cup flour
3 cups panko
1 cup grated Parmesan cheese
1 tsp kosher salt, divided
1/2 tsp black pepper, divided
6 boneless, skinless chicken breasts, pounded to 1/2-inch thickness
2 tbsp canola oil

1. Pour buttermilk into a shallow dish. Set aside. Pour flour, 1/2 tsp salt, and 1/4 tsp pepper into a separate shallow dish, mix to combine and set aside. Combine panko, grated Parmesan cheese, remaining 1/2 tsp salt, and 1/4 tsp pepper in a third dish. Stir to combine.
2. Heat a large NON-non-stick (got that? we want the stick here!) skillet over medium heat, add 1 tbsp of the oil.
3. Dip pounded chicken breasts, one at a time, in buttermilk. Allow excess to drip off then dredge in flour, followed by a second dip in buttermilk, and finally dredge in panko mixture.
4. Place half the chicken breasts into hot skillet and cook, flipping once, until crisp and golden brown on the outside and cooked through (about 4 minutes per side, depending on size). Repeat with remaining chicken.

Arugula Salad

3 cups arugula
1 large tomato, chopped
Juice of 1 lemon
1 tsp Dijon mustard
1 tbsp shallots, minced
1/4 cup good quality olive oil
salt and pepper to taste
1/4 ounce Parmesan cheese

1. Combine arugula and chopped tomato in a large bowl.
2. To make the dressing, combine lemon juice, mustard, shallots, salt and pepper in a small bowl. Slowly whisk in olive oil. Pour dressing over salad. Top with shaved Parmesan.

Thursday, August 23, 2012

Back to School Cupcakes

Looly started first grade yesterday. First Grade! Since Bean and Roo still have a week of summer vacation to go, the three of us made her a special treat while she was away at school.
Yes, I totally ripped this off of Pinterest. The idea is straight from FamilyFun Magazine, but we modified it a bit according to what we had on hand.

First we made egg-free, nut-free chocolate cupcakes from our trusty Divvies Cookbook.

Then we licked the beaters - one of the best benefits of egg-free baking!

While the cupcakes cooled we made a quick trip to the grocery store for chocolate covered graham crackers. Keebler Deluxe Grahams are nut-free, egg-free and the perfect size for little cupcake blackboards.
Then the real fun began. Bean and Roo used strawberry and green apple Laffy Taffy to roll tiny red and green apples with stems while I piped school-related messages in white frosting onto the chocolate covered graham crackers. Then we frosted the cupcakes in bright blue and school bus yellow.
Together we placed the blackboards and apples on the frosted cupcakes and topped them off with a tiny piped line of white chalk.
Many of you know that artistry is not my strong suit but these were well within even my shaky abilities. Looly loved her cupcakes and asked for them again next year. I said sure but warned her that next year, the math problems are going to get harder.

Friday, August 17, 2012

Egg-free Sunbutter Cookies

Among the joys I lament Roo missing out on due to his allergies, a tray of peanut butter cookies cooling on the counter ranks near the top, right behind family vacation to Thailand.
It's not just the infatuating aroma of nutty goodness wafting through the fall leaves as he steps off the school bus or the crumbly hunger quelling first bite after swimming lessons, it's the process. I have such fond memories of hovering over a tray while my mom rolled neat balls, poised with my fork, ready to press in the telltale crisscross pattern that proclaims, stop what you're doing, there are homemade peanut butter cookies over here!
We've been using peanut butter substitutes for years on sandwiches, in sauces, on crackers, apples, and much more. To be fair we've all grown quite fond of Sunbutter as a worthy substitute. But, we've already lost eggs in our baking due to, you guessed it, Roo's allergies, and I get nervous when we start over-substituting. Up until now I've avoided making Sunbutter cookies all together for fear of their shortcomings without peanut butter or eggs.

Sometimes someone should shake me. I made these and maybe it's been too long since I tasted real peanut butter, but I could not tell the difference. I kid you not, these are the real deal.

Egg-Free Sunbutter Cookies
adapted from Food.com

1/2 cup sunflower butter (we use Sunbutter)
1/2 cup granulated sugar
1/2 cup brown sugar
1/2 cup unsalted butter (room temperature)
1 tsp vanilla
1 & 1/4 cups flour
1/2 tsp salt
1/2 tsp baking powder
1/2 tsp baking soda
1/2 cup mini-chocolate chips (optional)

1. Preheat the oven to 375 degrees. Combine the sunflower butter, both sugars, butter and vanilla. Mix well. Add flour, salt, baking powder and soda and mix again until combined. Stir in chocolate chips, if using.
2. With clean hands, roll the dough into balls, about 1/2-inch diameter. Place on a cookie sheet. Enlist your favorite child or children to gently mark each cookie with a fork in a crisscross pattern.
3. Bake 8-10 minutes until light golden brown. Allow tray to sit for a few minutes then transfer cookies to a wire rack to cool completely. Store in an airtight container.