Showing posts with label snack. Show all posts

Saturday, April 27, 2013

Sesame Sweet Potato Miso Dip

I owe many a luxurious and enlightening Sunday afternoon to one fine group of ladies. How else would I justify needing to spend a cozy hour curled up in an armchair furiously finishing a novel? And more importantly, when would I get to chomp pecan cookies, start drinking at one in the afternoon or have the excuse to make egg-filled cakes and other contraband delights? Give it up for book club.

Sure, sometimes we overdo it on the wine, but typically not until after we discuss the book. Briefly.
Not only do my book club ladies read, they cook. And they eat (with enthusiasm I might add) all the stuff I don't normally get to make at home. And I love them all the more for it.

Every time book club rolls around I'm faced with the impossible decision: sweet or savory? Clearly the answer is both. This time around blueberry-lemon yogurt cake with lemon cream was an easy sell and will be coming in a later post. I have promised Roo an egg-free version. Wish me luck.

The real dark horse though, is this crazy good sweet, silky, salty dip.
Sesame is such a rock star - all that toasty deep earthy flavor of nuts, without the nuts. Add the creamy sweetness of the potatoes, salty bite of miso and my friends, you have one heck of a dip on your hands. 

I actually had no intention of sharing with the kids but when Bean came by asking what that yummy smell was (toasting sesame seeds) I couldn't pass up the opportunity. The kiddos dipped snap peas and carrots and somewhat shockingly, no one snorted, choked, or exhibited odd facial contortions. A couple of kids even came back for a second round. That's a winner in my book.

Sesame Sweet Potato Miso Dip
adapted from Sunset Magazine December 2010

1 pound sweet potatoes
1 tbsp minced fresh ginger
2 tbsp white miso
2 tbsp tahini
2 tsp soy sauce
1 scallion, thinly sliced
toasted sesame seeds for garnish

Peel the sweet potatoes and cut into large chunks. Place the potatoes in a large pot and cover with water. Bring to a simmer over medium heat and cook until soft but not falling apart, about 15-20 minutes. Remove the sweet potatoes from the water and allow to cool slightly. Reserve the cooking liquid.

Combine the cooked potatoes, ginger, miso, tahini, and soy sauce in a food processor or powerful blender. Puree the mixture, adding cooking liquid from the potatoes as needed until the mixture is smooth and silky. Transfer the dip to a serving bowl. Sprinkle with scallions and toasted sesame seeds. Serve with fresh vegetables for dipping.

Monday, February 11, 2013

Miss M's Homemade Garlic Hummus

I have already professed my love for Yotam Ottolenghi and Sami Tamimi's cookbook, Jerusalem. But just in case you didn't get the memo the first time, it is spectacular.

Here's the thing. You know how fancy European style bakeries seduce you with gooey rustic fruit tarts, fluffy whipped cream-topped pots de creme and snowy rows of toasted coconut pastries that legitimize all your 8-year-old fantasies about what dessert is supposed to be? Yeah, well, Yotam Ottolenghi and Sami Tamimi do that too. But with vegetables. And legumes. 
Hummus, right. It's relatively innocuous. Two out of three KC kids dip carrot sticks and crackers in it by their own free will so that's something. I pick up a plastic container every couple of weeks at the grocery store, so why don't I ever make my own? Assuming you cook the beans ahead of time or use (gasp!) canned, it takes all of 10 minutes. That's not including resting time which I interpret more as sampling and adjusting time anyway.

As with most bean-based endeavors, Bean was looking forward to serving as kitchen assistant on Project Hummus. When the time came, however, she'd been sucked into a lengthy "game" of school with a relentless and exacting teacher, her big sister, Looly, and there was no recess to be had. Thankfully my adorable niece and cooking buddy, Miss M, stopped by to help me out instead.
At the risk of maxing out the cute-o-meter, I'm posting this photo of Miss M at work anyway. Look at that smirk! She was a stellar helper but do you think she tried a lick when we were finished? Not a chance.

Miss M's Homemade Garlic Hummus
Adapted from Jerusalem a Cookbook by Yotam Ottolenghi and Sami Tamimi

3 & 1/2 cups cooked garbanzo beans
1 cup tahini paste
4 tbsp freshly squeezed lemon juice
8 cloves garlic (it is garlic hummus, people)
1 & 1/2 tsp salt
6 to 8 tbsp cold water
1 tbsp parsley, chopped
1 tbsp sunflower seeds

Put the garbanzo beans in a food processor. If your food processor canister is on the small side, like mine, you might want to divide everything in half and work in 2 batches. Miss M and I almost blew the lid off ours trying to do too much at once.

Process the beans until they form a paste. Keep the machine running and pour in the tahini, lemon juice, garlic, and salt. With the machine still running, add the water a tablespoon at a time until you reach your perfect hummus consistency. This is a most personal preference. For me it took 7 tablespoons. Let the hummus rest for 30 minutes or more.

Spoon the hummus onto a plate, garnish with parsley and a sprinkle of sunflower seeds for a little crunch. Serve with warm pita, carrot sticks, cucumber slices, or just about anything else you care to dip.
more garlic = more yummy

Monday, January 21, 2013

Frozen Yogurt Drops

You need to make these. Seriously, make them right now. I'm betting you already have everything you need in the fridge. If you take 5 minutes now, they'll be ready by the time your kids get home from school, and you, my friend, will be sitting pretty on that pedestal reserved for Superstar Parent of the Week. You can thank me later.
On that day you're feeling guilty because you don't have time for paper mache butterfly crafts and building marble runs, you will make these. When you can't steal 15 minutes to read the next installment of the Boxcar Children to your twins because they don't want their sister to read it out loud to them they want you to read it out loud, you will make these. When the kids are asking, what are we going to do today while you need an oil change, have 15 emails to answer, grocery shopping to do, a school fundraising meeting, and a workout to fit in? That's the day you're going to make these. And everyone's going to wind up happy.

Here's the drill:
Pull some yogurt out of the fridge. See, I told you you already have everything you need! Any flavored yogurt will do, full fat, no fat, some fat, Greek, vanilla, strawberry, pineapple, goji berry papaya coconut swirl, pretty much anything but plain.

Now, and this part is purely optional, stir a drop of food coloring into the yogurt. I used orange for mango, yellow for pineapple, purple for blueberry, you get the idea. It's totally unnecessary but if you want to jazz things up and have some food coloring on hand, I say go for it. Who can't use a little extra color in mid-January?
Scoop each flavor of yogurt into a plastic baggie. Snip a corner off each bag with scissors and pipe bite size rounds onto a sheet pan.
Don't like using plastic bags? Fear not. Just use a teaspoon and drop dollops onto a tray like you would cookie dough instead.
Now put them in the freezer for a couple of hours. When they're frozen solid, pop them off the pan with a spatula (if like me, you require said pan for dinner) and toss them into a clean plastic freezer bag or other container and keep them frozen until you're ready to serve. That's it!
Super cute, healthful, crazy delicious to snack on while blogging doing homework and preposterously easy!
Kids seem to like them.
But make some extra for the grown ups!

Tuesday, December 11, 2012

Parmesan & Thyme "Cookies"

In all fairness, Ina Garten calls these Parmesan & Thyme Crackers but I call them cookies. Doing so triples the chances your children will eat them. I recommend it.
Buttery, cheesy, crumbly, herb cookies are so tasty with a sippy cup of milk, a mug of tea, or a glass of champagne, simple enough for kids but elegant enough for your fanciest dinner party.
The thyme is truly magical here. The herbs keep the flavor bright despite the ample butter and cheese. And really, what would a cookie be without a fair amount of butter?

Parmesan and Thyme "Cookies"
adapted slightly from Barefoot Contessa Back to Basics

1/2 cup unsalted butter (1 stick), at room temperature
4 ounces Parmesan cheese, finely grated
1 & 1/2 tsp fresh thyme leaves, minced
1/2 tsp salt
1/4 tsp freshly ground black pepper*
1 & 1/4 cups all-purpose flour

1. Using an electric mixer, cream the butter for about 1 minute. Add the cheese, thyme, salt and pepper and mix until well combined. Add the flour and continue to mix on low until the dough forms large crumbles. If the dough seems too crumbly and won't clump together, add a little water, 1 teaspoon at a time until it is workable.
2. Dump the dough onto a floured counter or board. Press the dough together into a mound and roll into a 9-inch log. Wrap in plastic wrap and refrigerate for at least 30 minutes and up to a few days.
3. Preheat oven to 350 degrees. Line a baking sheet with parchment paper. Use a sharp knife to cut the dough into 3/8-inch rounds and place them onto the parchment-lined baking sheet. Bake for 22 minutes until lightly browned. Cool on wire racks and serve at room temperature.

*The original recipe calls for 1/2 tsp of black pepper but I reduce it by half as the shorties in my house are pepper-averse. Add a little more or less to suit your audience. 
 

Wednesday, December 5, 2012

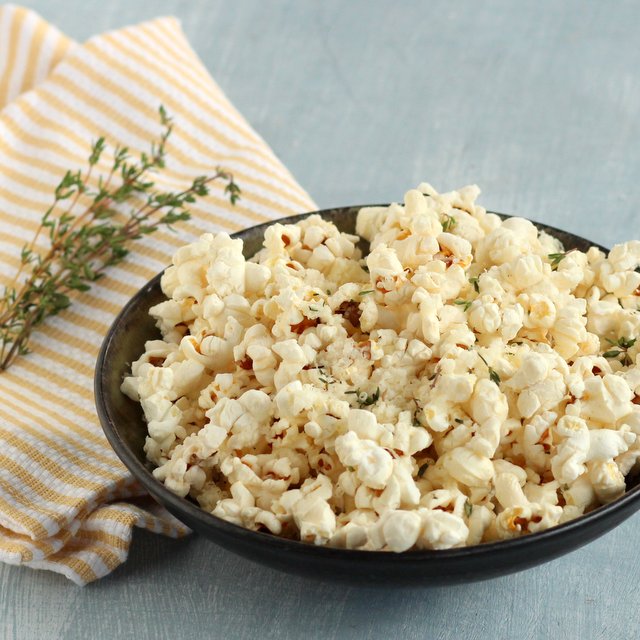
Asiago Thyme Popcorn

It was 70 degrees here the week. December 3rd. Chicago. 70 degrees.

We could not let a day like that pass us by so after school the kids and I spent the final hours of daylight doing gymnastics, swinging from monkey bars, and playing "triathlon" which, as far as I can tell, entails jumping off a moving bike and running as fast as you can for about 30 yards wearing a helmet. Good times. But all that outdoor activity also means we needed a quick and easy, tasty snack.
Asiago Thyme Popcorn

6 cups popped popcorn (give or take)
4 ounces Asiago cheese*, finely grated (about 3/4 cup grated)
1 tbsp kosher salt
1 tbsp fresh thyme leaves, chopped
Cooking spray or 1 tbsp melted butter

While the popcorn is still hot, spray lightly with a little cooking spray or drizzle with melted butter and toss to coat. Throw the cheese, salt, and thyme over the top of the popcorn and toss again. Distribute in individual snack bags and hand out to hungry kids. Don't forget a bag for yourself!

*Parmesan would work nicely too. We just happened to have a hunk of Asiago hanging around looking for a home.
It doesn't get much easier. Cheese-loving Looly dubbed this "the best popcorn ever" and claimed the leftovers for her snack at school today. Not a bad review for 10 minutes of my time.

Sunday, November 18, 2012

Whole Wheat Blackberry and Meyer Lemon Ricotta Scones

Blackberry. Ricotta. Meyer lemons. Uh-huh.
I've been on the prowl for a superstar egg-free scone recipe for some time. Leave it to Deb Perelman, Smitten Kitchen food blogger extraordinaire and author of The Smitten Kitchen Cookbook to have my back. She has a luscious recipe for whole wheat raspberry ricotta scones (no eggs!) that has been calling my name since I stumbled upon it months ago.
Sadly, winter raspberries in Chicago always look like they've been pre-chewed by the time I get to them. And while still far from the plump farmers market jewels we get in August, November grocery store blackberries seem to hold up better to the wear and tear of stock boys and throngs of Thanksgiving shoppers. And the Meyer lemons? They were winking at me across the aisle, glinting their sunny skins right into my eyes, refusing to be ignored.

Whole Wheat Blackberry and Meyer Lemon Ricotta Scones
adapted from Smitten Kitchen

1 cup whole wheat flour
1 cup all-purpose flour
1 tbsp baking powder
1/3 cup granulated sugar*
1/2 tsp salt
6 tbsp cold, unsalted butter
1 cup fresh blackberries, lightly chopped into halves and quarters
1 Meyer lemon (or regular lemon), zest and juice
3/4 cup whole milk ricotta cheese
1/3 cup heavy cream

*The original recipe calls for 1/4 cup of sugar, but since I wasn't sprinkling any coarse sugar on top of these babies and I wanted to make sure the kiddos would love them, I upped it ever so slightly. 

1. Preheat the over to 425 degrees. Line a baking sheet with parchment paper. Whisk together the flours, baking powder, sugar, and salt. Using a pastry blender or 2 forks, cut the cold butter into the flour mixture until the biggest chunks are no larger than a small pea. This might take a few minutes. Be patient.
2. Add the chopped blackberries and lemon zest to the flour-butter mixture. Stir to combine.
3. Add the juice from the lemon, ricotta, and heavy cream all at once. Stir with a rubber spatula until just combined. Knead the dough a few times with your hands. Turn the dough out onto a floured surface and pat it into a circular mound.
4. Use a sharp knife and a steady hand to cut eight wedges and transfer to the prepared baking sheet.
5. Bake about 15 minutes until golden brown and crisp at the edges. Allow scones to cool on the pan for a few minutes then transfer to a cooling rack. These are best the day they are baked, but can be frozen and reheated in the oven in a pinch.
Ridiculous, right? These are so freakin' good. Looly polished one off before she took her coat off after school. I would have scolded her but the truth is that mine never even made it onto the cooling rack.
 I'm thinking cranberry-blood orange scones for Christmas morning. What do you think?

Tuesday, November 13, 2012

Easy Baked Cinnamon Apple Chips

My chip fixation continues.

I know what a process it can be to make exciting, tasty, remotely nutritious party food for one kid with food allergies, but with an entire classroom of allergies to contend with, it can be next to impossible. Just try to come up with a safe, healthful "treat" that a bunch of 6-year-olds with candy and costumes on the brain will actually want to eat. I don't want to pull a muscle patting myself on the back but I contend these baked apple chips do the trick.
I made these for Looly's first grade class Halloween party a couple of weeks ago. The kids took them down and came back for more, which considering we were less than 3 hours away from official trick-or-treating time, was freaking amazing.

Better yet these are so easy to make they're really more of a non-recipe. In fact, it didn't even occur to me to post them here until a few adults at Looly's party were stunned that I had made them, automatically assuming that I must have used a food dehydrator or some other obscure gadget. No, friends. Assuming you have an apple, a mandoline, and an oven at your disposal, the process is embarrassingly simple. 
Baked Cinnamon Apple Chips

4 apples, sliced thin on a mandoline, or if your knife skills are that good, have at it that way.*
1 tsp granulated sugar
1 tsp ground cinnamon

1. Preheat the oven to 200 degrees. Line several baking sheets with parchment paper. Place the apple slices in a single layer on the parchment-lined baking sheets. Sprinkle lightly with cinnamon and sugar.
2. Bake for about 2 hours, turning apples over after the first hour. After 2 hours, turn the oven off but leave the apples to continue to crisp up until the oven is cool.

*Leave the skin and core intact. It's just prettier that way. Choose any apple variety you like just keep in mind that the juicier the apple the longer it will take to dry out. For reference, I used Granny Smiths and Honey Crisps.
There you have it - allergy-friendly, kid-approved, healthful, seasonally appropriate baked cinnamon apple chips. They'll keep for several days in an airtight container, but my advice is make them on the day of your shindig. Your house will smell amazing and everyone will assume you're a domestic goddess. Save your leftovers for lunchboxes!

Monday, July 23, 2012

Herby Pea and Ricotta Tart

Mufasa's herb garden is going bananas. I'm hoping to say the same about the tomatoes in a few weeks but for now, the focus is on trying to use as much mint and basil as possible. Hence, this pretty little morsel from the garden. 
I made this tart for my book club a few weeks ago and shockingly the kids were bummed that they didn't get to try it. Had it been a platter of cupcakes I wouldn't have given the matter a second thought, but pea tart? Okay!

Don't ask where Bean's shirt is. Skin, spatulas, and cupcake aprons. That's how we roll.
Herby Pea and Ricotta Tart
adapted from Cooking From the Farmers' Market by Jodi Liano and Tasha DeSerio

8x10-inch rectangle of puff pastry, thawed
2 cups peas, fresh or frozen but thawed
1 cup ricotta cheese
3 tbsp mint, coarsley chopped
3 tbsp basil, coarsley chopped
1 lemon, zest and juice
1 leek, washed and thinly sliced
salt and pepper

1. Bake the puff pastry on a baking sheet lined with parchment paper at 400 degrees for 10-13 minutes until puffy. Remove from oven. Place a second sheet of parchment paper on top of pastry, lay a second baking sheet on top of parchement to compress the puff pastry and return to oven for 10-13 minutes more. Remove when golden brown and crisping at the edges. Set aside to cool.
2. In a food processor, combine half the peas, all the ricotta, half the mint, and half the basil. Process to make a thick puree. Season with salt and pepper.
3. In a separate bowl combine the remaining peas, mint, basil, lemon juice, zest, and leek. Spread the ricotta mixture over the puff pastry. Top with the pea and herb mixture. Garnish with additional mint and basil leaves if desired. Cut into squares and serve immediately.
In the end the girls were not huge fans of the tart as a whole, but they enjoyed the individual elements. Looly liked the peas and puff pastry and ate plenty of both for dinner. Bean liked the peas, the ricotta puree and the puff pastry, but not all together. After much prodding, Roo sampled a tiny taste of puff pastry but as I've mentioned before, he's a one texture at a time kind of kid.

Personally I think it rocks. Lemony, light, crisp, creamy and hearty enough to make a decent lunch. It's good now at the height of summer but I can so see it on an Easter buffet using some new spring peas - yum!

Thursday, July 19, 2012

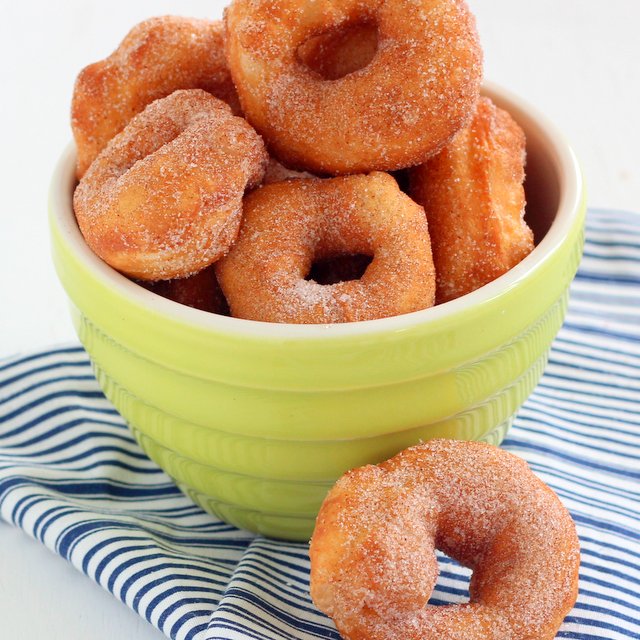
Intro to Fried Dough

 Ever wonder what to do with leftover pizza dough?
We had make-you-own pizza night not so long ago. As usual the kids had fun beating dough into submission with their fists, popping air bubbles, spreading sauce, picking toppings and throwing mozzarella around the kitchen. Looly, our resident artist, made this cute owl out of black olive rings and fresh basil.
All in all a good night, but in the morning we were left with a puffy ball of unused pizza dough in the fridge. Sure we could have made calzones for lunch or baked it into bread or crackers, but I had a better idea. I wanted to show to the kids how food can transform drastically depending on how you prepare it, thus illustrating my point that they shouldn't say they don't like a food after trying it prepared any single way. Fried dough, anyone?
Easy Fried Dough (from pizza dough)

1 pound pizza dough
Enough canola or vegetable oil to fill a large heavy bottomed pot about 1-2 inches (about 2 cups, depending on the size of your pot)
1/2 cup powdered sugar
1/2 cup granulated sugar
1 tbsp. cinnamon

1. Heat the oil to 350 degrees on an instant read thermometer. Cut pizza dough into desired shapes. We made little doughnut holes and I rolled out some longer strips and fused the ends together to make mini doughnuts.
2. Drop dough (fry same size pieces together) in batches into the hot oil. Fry, turning occasionally until all sides are golden brown and the dough floats to the top of the oil. Remove fried dough from the oil and drain on several layers of paper towels.
3. Place powdered sugar in bowl. Combine granulated sugar and cinnamon in a separate bowl. Toss the warm fried dough in desired toppings, which is the perfect job for helpful, hungry kids.
So, it's fried dough. It's warm and crispy and gooey and sweet and delicious. And my kids didn't like it. Well, most of them didn't like it. Looly deemed it too sweet and asked for a banana instead, though she did enjoy licking powdered sugar straight out of the bowl. Roo was not a fan. He is typically more of a salty kind of guy. Bean though, was nearly as big a fan as her parents, which is why we ended up throwing away half the batch while we could still save ourselves. Really good stuff. In moderation.