Showing posts with label Parmesan. Show all posts

Monday, March 18, 2013

Broccoli Mac and Cheese

On my list of priorities, making homemade macaroni and cheese falls pretty far down the list somewhere between backing up old photos and ironing the duvet cover - not a euphoria-inducing endeavor, but not quite torture either.

The KC kids don't eat much boxed macaroni and cheese to begin with, unless we're traveling and need a safe, non-refrigerated option that won't make Roo break out in hives. In that case I'm all about a little Annie's or in a pinch, good old-fashioned toxic food dye-laced Kraft . It's not ideal, I know, but faced with a road trip choice of food dye versus anaphylaxis, I opt for the dye.

Anyway, the March issue of Cooking Light has a recipe for Cheesy Penne that looked relatively innocuous (and fast!) and being that it was 4:30 PM on gymnastics night and I happened to have everything on hand, I gave it a go. You should too.
Broccoli Mac and Cheese
adapted from Cooking Light

16 ounces short pasta (any shape)
6 cups broccoli florets
2 cups milk
3 tbsp all-purpose flour
3 tbsp cream cheese
1&1/2 tsp Dijon mustard
1 tsp kosher salt
1/2 tsp black pepper
1/4 tsp ground nutmeg
1 cup shredded 4 cheese Italian blend (or similar shredded, meltable cheese)
1/4 cup grated fresh Parmesan cheese, for topping

Cook the pasta according to package instructions. During the last 3 minutes of cooking, throw in the broccoli. Drain the pasta and broccoli together in a colander and transfer to a large bowl.
Combine the milk and flour over medium heat in a saucepan. Whisk the mixture until it's nice and smooth, then continue to cook until it starts to thicken, about 5 minutes. Remove from heat and stir in all the remaining ingredients, except the Parmesan. Whisk until smooth.
Pour the cheese mixture over the pasta and broccoli and toss together. Distribute into individual bowls and top with freshly grated Parmesan.
Much better than the bright orange carcinogenic stuff, don't you think? In all fairness my masterpiece went over about as well as boxed mac and cheese with the KC kids. They asked me to leave the broccoli on the side next time. They didn't like it cheesy.

I, on the other hand, hate boxed macaroni and cheese with a passion, but this I can handle without a single grimace or whine. The Dijon and nutmeg do wonders to amp up the flavor a bit without overwhelming the more sensitive taste buds of preschoolers.
So, no carcinogenic food dyes were ingested, the pasta got eaten (along with sides of plain broccoli) and we made it to gymnastics on time. Really, I can't ask for more.

Thursday, February 7, 2013

Cheesy Pinwheel Buns

In line with my current engrossment with The Smitten Kitchen Cookbook, we used a recent day off from school to make a version of Deb's Cheddar Swirl Breakfast Buns. Since the KC kids are not huge dill fans, we opted to leave that part out and replaced some of the cheddar cheese with our family fave, Parmesan.
The munchkins had so much fun making dough.
Yeast is still a magic potion for them. They can't get enough of watching dough rise.
Cheesy Pinwheel Buns
adapted from The Smitten Kitchen Cookbook
makes 12 buns

For the dough
3 cups all-purpose flour
1 tsp salt
1/4 tsp black pepper
1 tbsp sugar
1 (1/4-ounce or 2&1/4 tsp) packet instant yeast
1 cup milk
4 tbsp butter, melted and slightly cooled

For the filling
1/2 cup grated onion
1 cup grated sharp cheddar cheese
1/2 cup grated Parmesan cheese
1/4 tsp salt
dash black pepper

1. Whisk together the flour, salt, pepper, and sugar in the bowl of an electric mixer. In a separate small bowl, combine the yeast and milk. Whisk until the yeast dissolves. Pour the yeast-milk mixture and the melted butter into the flour mixture and mix using the paddle attachment on your mixer, or a wooden spoon if you're looking for an upper body workout, until the dough is holds together in a raggedy mass.
2. Switch to the dough hook and knead for 5-6 minutes on low speed, or if you're going the old fashioned route, dump the dough onto a well-floured surface and knead it with your hands for 8 minutes. In either case the kneading is done when the dough is nice and smooth and just barely sticky to the touch. Spray a large bowl with cooking spray or wipe the the bottom and sides with oil and transfer the dough ball to the bowl. Cover with plastic wrap and allow to rest in a warmish place for a couple of hours until it has doubled in size, like this (and yes, that is my son in a tutu, he always dresses his best for baking):
3. On a well floured surface, roll the dough out into a rectangle (about 12 x 16 inches or as close as you can get).
4. Mix together the onion, both cheeses, salt and pepper. Spread the filling over the dough leaving a 1/2-inch border at both short ends.
5. Start rolling from one short end to the other to make a log. Cut the log into 12 equal slices with a sharp knife.
6. Line a pan of your choice (two 9-inch rounds or one 9x13-inch rectangular pan) with parchment. Place the rolls cut-side up into the prepared pans, spacing them about 1 inch apart. Cover with plastic wrap and let rise again until they have doubled in size. (Deb recommends brushing the tops with melted butter at this point. We skipped it and still got beautiful yummy buns so take your pick).
7. Preheat the oven to 350 degrees. When the buns have doubled in size, pop them in the oven and bake for 20-25 minutes. You'll know they're done when the cheese is oozing out the top and starting to brown in places. Cool slightly on a wire rack and serve warm.
These fill the house with really good smells. So good in fact that my photo session was cut short by a band of hungry monkeys demanding to be fed. Yup, that's a diffuser behind Roo and that's him eating my prop. I suppose that's success if I've ever had any.

Monday, January 28, 2013

Baked Parmesan Green Bean Fries

We've turned our beets, kale, apples, and Brussels sprouts into chips, so why not green bean fries?
The real trick with these bad boys is getting them to crisp up, since crunchy fries are clearly superior to squishy ones. It's a delicate balance between mush, crisp and burnt and quite honestly, it's hard to get every last fry perfectly crisp, but here's what I've learned in my trials.

1. Use the thinnest green beans you can find. Haricots verts are ideal. 
2. Make sure your beans are completely dry. If you rinse them, get every last drop of water off them before you add oil or cooking spray.
3. Do use oil or cooking spray. You need something to help the cheese adhere to the beans. Otherwise, you end up with roasted green beans with a side of crispy Parmesan, which while not an awful situation to find yourself in, is not the point of this exercise.
4. Convection bake if you can. If you don't have a convection oven, it's no big deal but if you do, use it.
5. Don't open the oven door once you turn off the heat. No peeking!

OK. Now you're ready to begin.

Parmesan Green Bean Fries

1 pound hericots verts or thin green beans
1/2 cup Panko bread crumbs
2 ounces Parmesan cheese, finely grated
1 tsp kosher salt
1 tsp garlic powder
1 tbsp canola oil or cooking spray

1. Preheat a convection oven to 375 degrees (or 400 degrees for a regular oven). Combine the Panko, cheese, salt, and garlic powder in a small bowl and toss with your hands to combine.
2. Place the dry green beans on a sheet pan in a single layer. Toss the beans with 1 tablespoon of oil OR give them a good douse of cooking spray. Sprinkle the cheese mixture on top, gently turning and pressing the topping onto the beans. Some will fall off. Don't sweat it.
3. Bake for 15 minutes. Turn the oven off but leave the beans where they are. Do not open the door - not even for a sec to check on them. Let the beans cool in the oven for at least an hour or longer if you want to max out your crispiness.
4. Serve with a dip of your choice...garlic aoli, vinaigrette, or a simple side of marinara, which makes for a flavor combo that's slightly reminiscent of mozzarella sticks. Just sayin.

Tuesday, December 11, 2012

Parmesan & Thyme "Cookies"

In all fairness, Ina Garten calls these Parmesan & Thyme Crackers but I call them cookies. Doing so triples the chances your children will eat them. I recommend it.
Buttery, cheesy, crumbly, herb cookies are so tasty with a sippy cup of milk, a mug of tea, or a glass of champagne, simple enough for kids but elegant enough for your fanciest dinner party.
The thyme is truly magical here. The herbs keep the flavor bright despite the ample butter and cheese. And really, what would a cookie be without a fair amount of butter?

Parmesan and Thyme "Cookies"
adapted slightly from Barefoot Contessa Back to Basics

1/2 cup unsalted butter (1 stick), at room temperature
4 ounces Parmesan cheese, finely grated
1 & 1/2 tsp fresh thyme leaves, minced
1/2 tsp salt
1/4 tsp freshly ground black pepper*
1 & 1/4 cups all-purpose flour

1. Using an electric mixer, cream the butter for about 1 minute. Add the cheese, thyme, salt and pepper and mix until well combined. Add the flour and continue to mix on low until the dough forms large crumbles. If the dough seems too crumbly and won't clump together, add a little water, 1 teaspoon at a time until it is workable.
2. Dump the dough onto a floured counter or board. Press the dough together into a mound and roll into a 9-inch log. Wrap in plastic wrap and refrigerate for at least 30 minutes and up to a few days.
3. Preheat oven to 350 degrees. Line a baking sheet with parchment paper. Use a sharp knife to cut the dough into 3/8-inch rounds and place them onto the parchment-lined baking sheet. Bake for 22 minutes until lightly browned. Cool on wire racks and serve at room temperature.

*The original recipe calls for 1/2 tsp of black pepper but I reduce it by half as the shorties in my house are pepper-averse. Add a little more or less to suit your audience. 
 

Wednesday, December 5, 2012

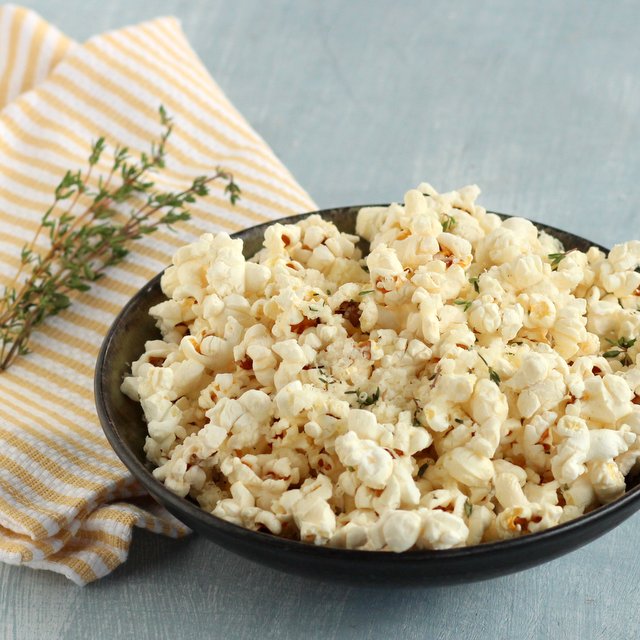
Asiago Thyme Popcorn

It was 70 degrees here the week. December 3rd. Chicago. 70 degrees.

We could not let a day like that pass us by so after school the kids and I spent the final hours of daylight doing gymnastics, swinging from monkey bars, and playing "triathlon" which, as far as I can tell, entails jumping off a moving bike and running as fast as you can for about 30 yards wearing a helmet. Good times. But all that outdoor activity also means we needed a quick and easy, tasty snack.
Asiago Thyme Popcorn

6 cups popped popcorn (give or take)
4 ounces Asiago cheese*, finely grated (about 3/4 cup grated)
1 tbsp kosher salt
1 tbsp fresh thyme leaves, chopped
Cooking spray or 1 tbsp melted butter

While the popcorn is still hot, spray lightly with a little cooking spray or drizzle with melted butter and toss to coat. Throw the cheese, salt, and thyme over the top of the popcorn and toss again. Distribute in individual snack bags and hand out to hungry kids. Don't forget a bag for yourself!

*Parmesan would work nicely too. We just happened to have a hunk of Asiago hanging around looking for a home.
It doesn't get much easier. Cheese-loving Looly dubbed this "the best popcorn ever" and claimed the leftovers for her snack at school today. Not a bad review for 10 minutes of my time.

Wednesday, October 10, 2012

Egg-Free Crispy Parmesan Chicken and Arugula Salad


Okay, excuse me for a moment but I am temporarily blinded by the cuteness that is this boy. Don't worry, it won't last long. It never does. Any minute there will be a defiant glance, a whine, a covert squeal-inducing pinch for a sister passing by. But for right now, in this moment, this boy, is super adorable, wonderfully agreeable, and to top it all off he's one heck of a chicken dredger. Screw egg allergies. Thanks to buttermilk, my boy can dredge.

Don't worry. Everybody gets their hands dirty.
Now, I've read the literature and I realize my kids are supposed to love chicken nuggets. They don't. I can't take credit for this since I have no idea what I did to incite their contempt for fast food. Honestly with the restaurant limits Roo's allergies place on us, I am not above a stop at the golden arches on a road trip if it means he can eat without going into anaphylactic shock. One health concern at a time, you know? Still, the KC kids would much prefer me to travel with a hunk of Parmesan cheese and a few apples in my purse than to suggest they eat nuggets for lunch.

So maybe your kids adore chicken nuggets, maybe they don't. That's really not the point. The point is, that this crispy crunchy golden chicken is way better than any old chicken nuggets. Whether they do or do not appreciate nuggets currently, if they go crazy for Parmesan cheese like mine do, they will likely enjoy this chicken. And bonus, it's one big nutritional step up from the ones you-know-who serves in a cardboard box. Use organic chicken, add a green salad, and you might as well start searching out wall space for your parent of the year plaque.
Looly teaching the art of finely grated Parmesan to a rapt audience
 Egg-Free Crispy Parmesan Chicken

1 cup buttermilk
1 cup flour
3 cups panko
1 cup grated Parmesan cheese
1 tsp kosher salt, divided
1/2 tsp black pepper, divided
6 boneless, skinless chicken breasts, pounded to 1/2-inch thickness
2 tbsp canola oil

1. Pour buttermilk into a shallow dish. Set aside. Pour flour, 1/2 tsp salt, and 1/4 tsp pepper into a separate shallow dish, mix to combine and set aside. Combine panko, grated Parmesan cheese, remaining 1/2 tsp salt, and 1/4 tsp pepper in a third dish. Stir to combine.
2. Heat a large NON-non-stick (got that? we want the stick here!) skillet over medium heat, add 1 tbsp of the oil.
3. Dip pounded chicken breasts, one at a time, in buttermilk. Allow excess to drip off then dredge in flour, followed by a second dip in buttermilk, and finally dredge in panko mixture.
4. Place half the chicken breasts into hot skillet and cook, flipping once, until crisp and golden brown on the outside and cooked through (about 4 minutes per side, depending on size). Repeat with remaining chicken.

Arugula Salad

3 cups arugula
1 large tomato, chopped
Juice of 1 lemon
1 tsp Dijon mustard
1 tbsp shallots, minced
1/4 cup good quality olive oil
salt and pepper to taste
1/4 ounce Parmesan cheese

1. Combine arugula and chopped tomato in a large bowl.
2. To make the dressing, combine lemon juice, mustard, shallots, salt and pepper in a small bowl. Slowly whisk in olive oil. Pour dressing over salad. Top with shaved Parmesan.

Friday, August 31, 2012

Swiss Chard Soup

My sister has a killer recipe for Swiss Chard Soup. Sadly, I've never made it because every time she sends me the recipe I lose it. Somewhere around here there's a goldmine of heirloom recipes tucked into one book jacket or another. But after searching in vain for the elusive recipe stockpile and faced with an overflowing vegetable drawer from the latest CSA delivery from Angelic Organics, I finally made up my own.
The bounty of vegetables presented the perfect opportunity to test out our new crock pot.  Ever since a batch of pulled pork cracked the insert of our old KitchenAid slow cooker for the third time, I've been on the lookout for a new, heartier model. After extensive research that mostly entailed reading amazon.com reviews, I decided it was time to downgrade. Yes, downgrade. Our new Crock Pot was cheaper and a little smaller that its predecessor (6 quarts vs. 7), but the reviews on this baby look great and after one round of chard soup, I am pleased. Fingers crossed that this crock doesn't shatter on me too. I'll keep you posted on that one but so far so good.
Swiss Chard Soup

2 tbsp olive oil
2 leeks, thinly sliced, and washed well
1 cup onion, chopped
2 cloves garlic, minced
1 large bunch of chard, washed, and roughly chopped
4 large carrots, chopped
3 cups waxy potatoes, cut into 1/2-inch cubes
6 cups chicken stock (or vegetable stock)
1 tbsp dried oregano
1 tbsp dried thyme
1 tbsp salt
1 tsp black pepper
1 Parmesan rind (I happened to have one in the freezer, but you could leave it out and add extra Parmesan on top when serving)
1 large bunch summer savory (or substitute fresh oregano), tied with twine for easy removal
Parmesan cheese for garnish

1. Heat olive oil in a large saute pan. Add onion, garlic, and leeks and saute until soft and fragrant, about 3 minutes. Add chard to the pan and continue to cook until the chard wilts.
2. Transfer chard mixture to a 6-quart (or slightly larger) slow cooker crock. Add next 8 ingredients (through Parmesan rind, if using) and stir gently. Nestle the bunch of summer savory right on top and cover. Cook on low setting for 8-10 hours. Garnish with plenty of freshly shaved Parmesan cheese and a serve with a hunk of crusty bread.
My champion chard spinner