Showing posts with label cheese. Show all posts

Saturday, July 6, 2013

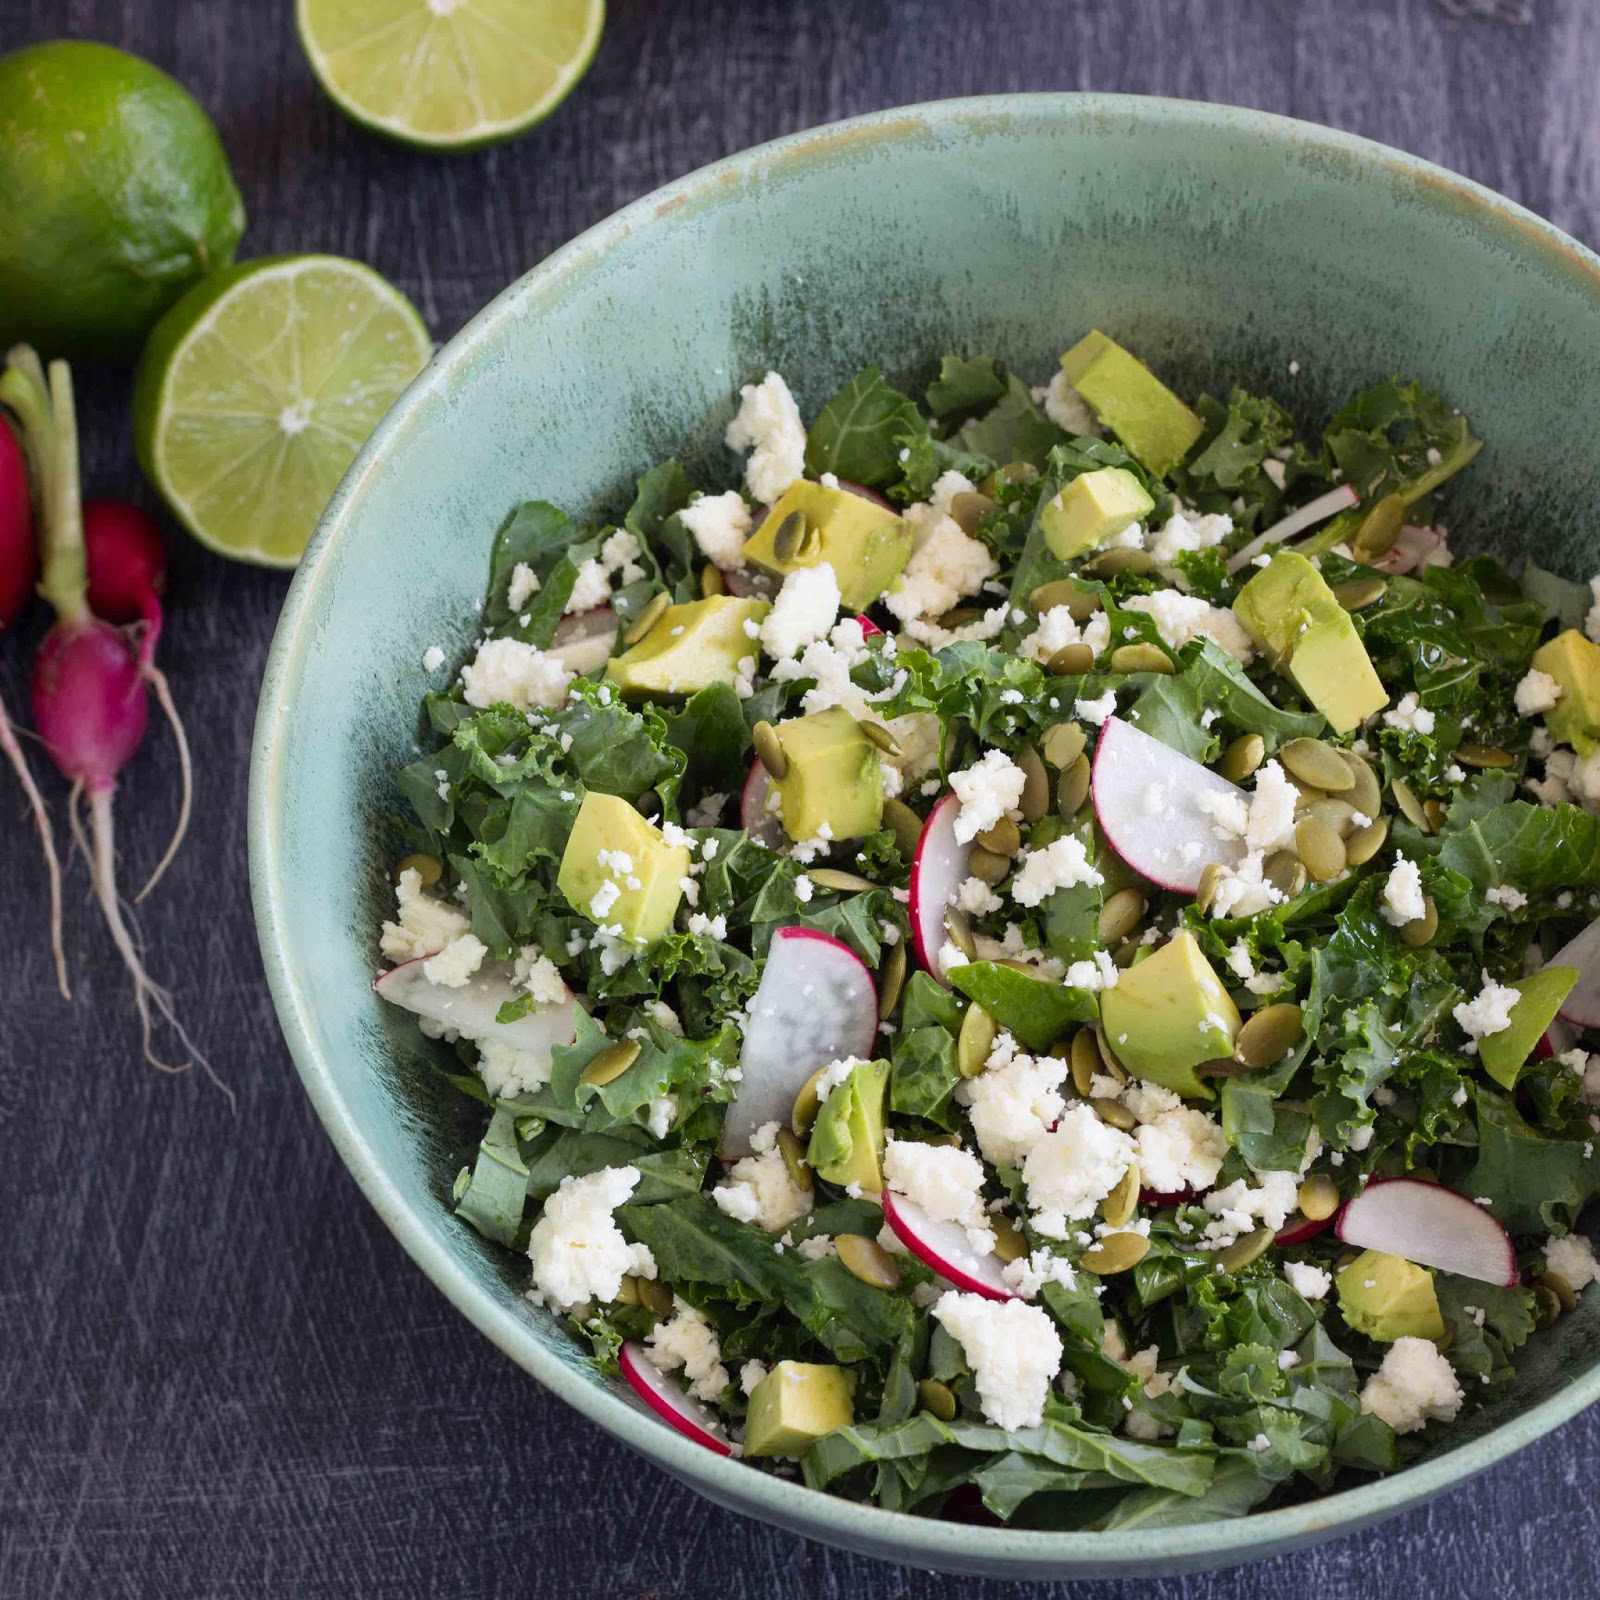
Mexican Kale Salad

It's CSA box season for Angelic Organics shareholders and our farmers' market is in full swing so all restraint has gone straight out the window. Three different varieties of crisp lettuces in addition to arugula and spinach, fresh herbs, broccoli, beets, turnips, radishes, scallions, kale and flats of ripe strawberries have taken over the kitchen, not to mention the peas and tomatoes that are starting to roll in from our own little garden plot. And we're just getting the season started!

This is obviously cause for celebration. Where we live, when it comes to fresh local produce, we get it while we can. Winters are rough. Thank goodness there's no season for chocolate or March would be completely unbearable around here. For now though, we're wallowing like a bunch of baby rabbits in nature's bounty.

But where are we going to put all of this gorgeous organic produce?
Main refrigerator compartment? Door? Crisper drawer? Dark, cool corner of the basement? What's the best place to store those luscious lettuces? For a quick crash course, check out this Freshness IQ Challenge put together by the food storage gurus at Wolf and Sub-Zero. As an added bonus, they'll donate a dollar to FoodCorps for every completed quiz.

So how'd you do? I know enough not to ruin juicy summer tomatoes by putting them in the fridge but I admit to storing fresh fish in the main fridge compartment all these years. Who knew?
Now that we have proper storage out of the way, it's time to put the good stuff to work make something awesome like perhaps...a little Mexican Kale Salad?

This is summer for lunch. Or dinner. Or breakfast for that matter. Starting the day off with a salad is a great way to meet your produce quota and helps ensure all those leafy greens get used. Forget Wheaties. Breakfast salad is where it's at. If you're a traditionalist and need a little more breakfast in your breakfast, try slicing a hard boiled egg on top.
Earthy ribbons of deep green kale play so well alongside buttery avocado, salty Cotija, kicky radishes, and crunchy pepitas but it's the lime that really got the kids. Looly, surprise surprise, picked out the avocado, but all three of the 7-and-unders in this house ate this kale salad. By choice. There was no cajoling. No bargaining. They actually dumped kale salad on top of plain pasta to make their own creation - Mexican Kale Pasta Salad, then had seconds. Those are my kids!
Mexican Kale Salad

For the dressing

1&1/2 tbsp sunflower oil (or canola, olive or grapeseed oil)
1 lime, juice and zest
1 tsp agave
1/4 tsp kosher salt
pinch freshly ground black pepper

For the salad

1 bunch kale, sliced into thin ribbons
1 avocado, cubed
4 medium radishes, thinly sliced
1/2 cup Cotija cheese, crumbled
1/4 cup pepitas

To make the dressing combine the oil, lime juice and zest, agave, salt and pepper in a small bowl. Whisk to combine.

In a large bowl, combine the salad ingredients. Pour the dressing over the top and toss gently. Let sit at room temperature for 15-30 minutes. Toss it again and serve. Garnish with more pepitas, a sprinkle of Cotija, and lime wedges.
Saturday, May 11, 2013

Spring on a Plate (Burrata with Simple Greens and Snap Peas)

The loveliest spring days call for the simplest of suppers.
The unseasonably mild winter was marvelous. The part where it lasted until May, less so. We're finally seeing the sun again. We're pulling out cushions for the patio furniture, scraping bird poop off the swing set, and wiping off the grimy window screens that never seem to make it down for winter. Spring, it's safe to say, has finally sprung here in the great Midwest.
Almost a year ago, the KC kids sampled Burrata for the first time in a mozzarella cheese-off. Despite a staunch vocal majority in favor of string cheese, Looly was swept off her feet by the Burrata. I have always liked that kid, so I've been keeping it in constant rotation strictly for her benefit. The fact that she never eats more than an ounce and I'm left to lick the plate has very little to do with it.

In celebration of Looly and Burrata enthusiasts everywhere, for the fans of chirping cardinals, lilac-scented breezes, humming lawn mowers in the distance and lazy days spent thumbing through cooking magazines outdoors on sun-warmed cushions, a most perfectly delightful spring supper.

So go ahead, pour yourself a cold glass of rosé. Let the kids sip spritzers of fruit juice and seltzer or agua fresca while they work. It'll only take a minute.

Fresh snap peas. A few greens. Slice a loaf of good bread and my friends, dinner is served. Because on days like this, you shouldn't part with the sunshine any longer than absolutely necessary.
Burrata with Simple Greens and Snap Peas
adapted from Bon Appetit

8 ounces sugar snap peas
4 cups baby greens (spinach, arugula, watercress, romaine, you name it)
1/4 cup fresh mint leaves
1/4 cup fresh basil leaves
3 tbsp extra virgin olive oil
zest of 1 medium lemon
2 tbsp fresh lemon juice
kosher salt or sea salt
freshly ground black pepper
1 large ball burrata cheese (about 1 lb)

Arrange your children around a shady outdoor table and have them pull the strings off the snap peas and trim the ends. If you can't drum up some kids, you're going to have to do this part yourself. Sorry.

Cut the peapods in half lengthwise or use your fingers to pry them apart, which turns out to be another fine task for the shorties in your life.

Combine the peapods, greens, mint, and basil in a large salad bowl. In a small bowl, whisk together the oil, lemon juice and zest. Season well with salt and pepper. Pour the dressing over the greens and toss gently to coat the leaves.

Now the fun part. This is a job for your favorite child...you know the one that never rolls their eyes, puts their dirty clothes in the hamper without being reminded, never forgets to flush the toilet, and has yet to utter the phrase "that's not fair." Yeah, I don't have one of those either. Work with what you've got. In any event, somebody needs to tear open the ball of burrata onto a platter. Let them make a real mess of it, it's going to get all prettied up with greens anyway.

The other less fortunate helpers can use their clean hands to scoop salad onto the platter around and atop the cheese. Slice some bread and tuck in. Taste spring. On a plate.

Monday, March 18, 2013

Broccoli Mac and Cheese

On my list of priorities, making homemade macaroni and cheese falls pretty far down the list somewhere between backing up old photos and ironing the duvet cover - not a euphoria-inducing endeavor, but not quite torture either.

The KC kids don't eat much boxed macaroni and cheese to begin with, unless we're traveling and need a safe, non-refrigerated option that won't make Roo break out in hives. In that case I'm all about a little Annie's or in a pinch, good old-fashioned toxic food dye-laced Kraft . It's not ideal, I know, but faced with a road trip choice of food dye versus anaphylaxis, I opt for the dye.

Anyway, the March issue of Cooking Light has a recipe for Cheesy Penne that looked relatively innocuous (and fast!) and being that it was 4:30 PM on gymnastics night and I happened to have everything on hand, I gave it a go. You should too.
Broccoli Mac and Cheese
adapted from Cooking Light

16 ounces short pasta (any shape)
6 cups broccoli florets
2 cups milk
3 tbsp all-purpose flour
3 tbsp cream cheese
1&1/2 tsp Dijon mustard
1 tsp kosher salt
1/2 tsp black pepper
1/4 tsp ground nutmeg
1 cup shredded 4 cheese Italian blend (or similar shredded, meltable cheese)
1/4 cup grated fresh Parmesan cheese, for topping

Cook the pasta according to package instructions. During the last 3 minutes of cooking, throw in the broccoli. Drain the pasta and broccoli together in a colander and transfer to a large bowl.
Combine the milk and flour over medium heat in a saucepan. Whisk the mixture until it's nice and smooth, then continue to cook until it starts to thicken, about 5 minutes. Remove from heat and stir in all the remaining ingredients, except the Parmesan. Whisk until smooth.
Pour the cheese mixture over the pasta and broccoli and toss together. Distribute into individual bowls and top with freshly grated Parmesan.
Much better than the bright orange carcinogenic stuff, don't you think? In all fairness my masterpiece went over about as well as boxed mac and cheese with the KC kids. They asked me to leave the broccoli on the side next time. They didn't like it cheesy.

I, on the other hand, hate boxed macaroni and cheese with a passion, but this I can handle without a single grimace or whine. The Dijon and nutmeg do wonders to amp up the flavor a bit without overwhelming the more sensitive taste buds of preschoolers.
So, no carcinogenic food dyes were ingested, the pasta got eaten (along with sides of plain broccoli) and we made it to gymnastics on time. Really, I can't ask for more.

Thursday, February 7, 2013

Cheesy Pinwheel Buns

In line with my current engrossment with The Smitten Kitchen Cookbook, we used a recent day off from school to make a version of Deb's Cheddar Swirl Breakfast Buns. Since the KC kids are not huge dill fans, we opted to leave that part out and replaced some of the cheddar cheese with our family fave, Parmesan.
The munchkins had so much fun making dough.
Yeast is still a magic potion for them. They can't get enough of watching dough rise.
Cheesy Pinwheel Buns
adapted from The Smitten Kitchen Cookbook
makes 12 buns

For the dough
3 cups all-purpose flour
1 tsp salt
1/4 tsp black pepper
1 tbsp sugar
1 (1/4-ounce or 2&1/4 tsp) packet instant yeast
1 cup milk
4 tbsp butter, melted and slightly cooled

For the filling
1/2 cup grated onion
1 cup grated sharp cheddar cheese
1/2 cup grated Parmesan cheese
1/4 tsp salt
dash black pepper

1. Whisk together the flour, salt, pepper, and sugar in the bowl of an electric mixer. In a separate small bowl, combine the yeast and milk. Whisk until the yeast dissolves. Pour the yeast-milk mixture and the melted butter into the flour mixture and mix using the paddle attachment on your mixer, or a wooden spoon if you're looking for an upper body workout, until the dough is holds together in a raggedy mass.
2. Switch to the dough hook and knead for 5-6 minutes on low speed, or if you're going the old fashioned route, dump the dough onto a well-floured surface and knead it with your hands for 8 minutes. In either case the kneading is done when the dough is nice and smooth and just barely sticky to the touch. Spray a large bowl with cooking spray or wipe the the bottom and sides with oil and transfer the dough ball to the bowl. Cover with plastic wrap and allow to rest in a warmish place for a couple of hours until it has doubled in size, like this (and yes, that is my son in a tutu, he always dresses his best for baking):
3. On a well floured surface, roll the dough out into a rectangle (about 12 x 16 inches or as close as you can get).
4. Mix together the onion, both cheeses, salt and pepper. Spread the filling over the dough leaving a 1/2-inch border at both short ends.
5. Start rolling from one short end to the other to make a log. Cut the log into 12 equal slices with a sharp knife.
6. Line a pan of your choice (two 9-inch rounds or one 9x13-inch rectangular pan) with parchment. Place the rolls cut-side up into the prepared pans, spacing them about 1 inch apart. Cover with plastic wrap and let rise again until they have doubled in size. (Deb recommends brushing the tops with melted butter at this point. We skipped it and still got beautiful yummy buns so take your pick).
7. Preheat the oven to 350 degrees. When the buns have doubled in size, pop them in the oven and bake for 20-25 minutes. You'll know they're done when the cheese is oozing out the top and starting to brown in places. Cool slightly on a wire rack and serve warm.
These fill the house with really good smells. So good in fact that my photo session was cut short by a band of hungry monkeys demanding to be fed. Yup, that's a diffuser behind Roo and that's him eating my prop. I suppose that's success if I've ever had any.

Monday, January 14, 2013

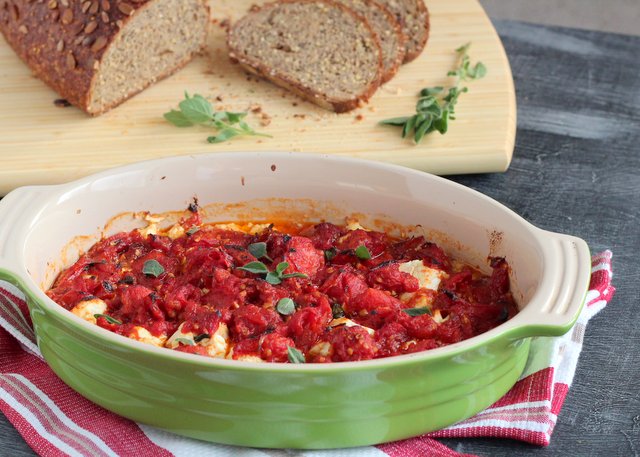
Baked Feta with Tomatoes

Withholding feta cheese from Looly is considered cruel and unusual punishment. So, when I made this baked feta for a potluck crafting party (Thanks Girl G!) a few weeks ago, I couldn't get it out the door without her finagling a taste. She's a fan. I hope you are too.
The feta is so stellar here because unlike its softer milder cousin, mozzarella, who's constantly trying to monopolize the yummy-when-melted-with-tomato-sauce glory, feta maintains its chewy firmness when baked. And the salt! The briny feta is spectacular alongside gushy, sweet, herby tomatoes.
Speaking of tomatoes I use a combo of fresh and canned. I like the saucy juices of the canned tomatoes alongside the bright bits of pulp and skin from the fresh. Feel free to use all of one or the other, just double up on your quantity.

With the Super Bowl just around the corner, what could be more crowd-pleasing and gut-thawing than a dollop of simple, soothing, savory warm cheese on crusty bread? File under perfect hearty winter party fare.

Baked Feta with Tomatoes

1 tbsp olive oil
3 cloves garlic cloves, minced
1 tsp crushed red pepper flakes
4 fresh, ripe tomatoes, chopped
1 14-ounce can diced tomatoes
2 tbsp chopped fresh oregano leaves
salt and pepper to taste
16 ounces best quality Greek feta cheese you can find

1. Heat the olive oil in a large skillet over medium heat. Add the garlic and saute for 1 minute. Add red pepper flakes and cook 30 seconds more. Add fresh and canned tomatoes and simmer until the sauce is slightly thickened, about 30 minutes. Stir in oregano leaves and season with salt and pepper, but go easy on the salt. The feta will provide lots of salty flavor. Meanwhile, preheat the oven to 400 degrees.
2. In an ovenproof dish, break the feta into pieces large and small. Scatter over the the bottom of the dish. Pour the tomato sauce over the cheese. Bake for about 25 minutes until the sauce is bubbly and thick and the top is just starting to char. Serve with crusty bread.

Wednesday, December 5, 2012

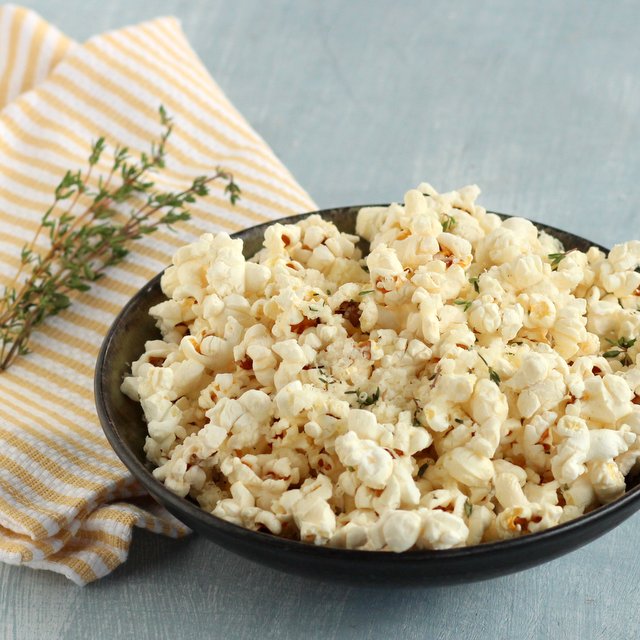
Asiago Thyme Popcorn

It was 70 degrees here the week. December 3rd. Chicago. 70 degrees.

We could not let a day like that pass us by so after school the kids and I spent the final hours of daylight doing gymnastics, swinging from monkey bars, and playing "triathlon" which, as far as I can tell, entails jumping off a moving bike and running as fast as you can for about 30 yards wearing a helmet. Good times. But all that outdoor activity also means we needed a quick and easy, tasty snack.
Asiago Thyme Popcorn

6 cups popped popcorn (give or take)
4 ounces Asiago cheese*, finely grated (about 3/4 cup grated)
1 tbsp kosher salt
1 tbsp fresh thyme leaves, chopped
Cooking spray or 1 tbsp melted butter

While the popcorn is still hot, spray lightly with a little cooking spray or drizzle with melted butter and toss to coat. Throw the cheese, salt, and thyme over the top of the popcorn and toss again. Distribute in individual snack bags and hand out to hungry kids. Don't forget a bag for yourself!

*Parmesan would work nicely too. We just happened to have a hunk of Asiago hanging around looking for a home.
It doesn't get much easier. Cheese-loving Looly dubbed this "the best popcorn ever" and claimed the leftovers for her snack at school today. Not a bad review for 10 minutes of my time.

Tuesday, June 12, 2012

Burrata, My Love, or Mozzarella Three Ways

Ever since a chance meeting at Scampo in Boston a couple of years ago, I've been head over heels in love with a voluptuous, decadent bundle of creamery goodness that goes by the name of Burrata cheese.
Refreshing and indulgent at the same time, it's like mozzarella pudding on a plate for crying out loud. Get me some tomatoes and a spoon. The Littles, however, are wary. Goopy and soupy are not big selling points with them, and the lack of vibrant color isn't helping. Time for a little side by side comparison.
Mozzarella cheese three ways. We sampled:

1. Everyday mozzarella string cheese (Frigo brand, in case you're wondering)
2. Fresh water-packed mozzarella
3. Burrata (we got ours at Trader Joe's)
Roo is surely googling Burrata on the iPhone
And the winner is (surprise surprise) Frigo String Cheese by a vote of 2-1. Looly chose the Burrata, which sent chills of pride up my spine. She thought it looked just like a present waiting to be unwrapped, which isn't far from the truth, and smeared it over sliced bread to make her own hors d'oeuvres. Roo claimed to enjoy all three varieties, but the string cheese was the only one that showed any visible teeth marks after his taste. Bean is a string cheese girl all the way. She can't stand mushy cheese and found both the fresh mozzarella and Burrata "watery, slippery and not yummy."
Taste test complete, hefty ball of Burrata on a plate, I was left no choice.

Burrata and Heirloom Tomatoes

1 ball Burrata cheese
1/2 pint heirloom grape tomatoes, halved
good quality, fruity olive oil
balsamic vinegar
Kosher salt
black pepper, freshly cracked
1/4 cup basil, sliced (chiffonade is prettiest)

1. Place Burrata on a plate. Top with tomatoes. Drizzle olive oil and balsamic vinegar on top. Sprinkle with salt and pepper. Top with basil. Let the whole hot mess come to room temperature if you can stand the wait. Scoop in into your mouth with a freshly sliced baguette.